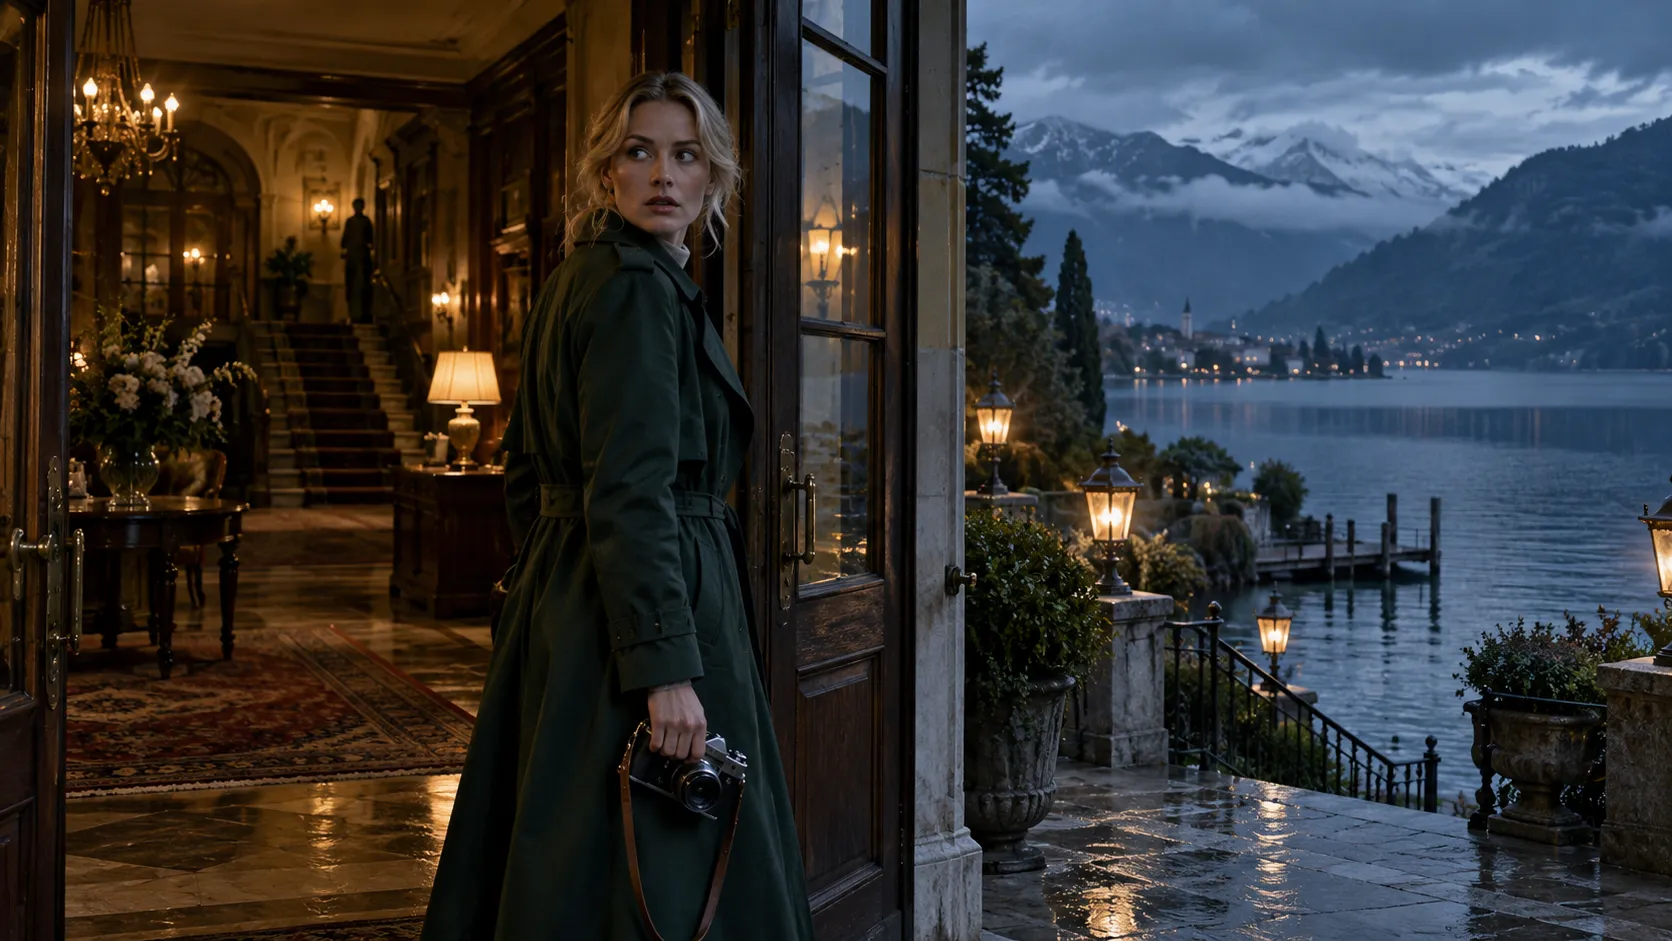
A common mistake when creating a long AI video is starting with one enormous prompt. You describe the character, location, actions, dialogue, camera movements, and ending all at once, then hope the model can turn everything into a coherent story.
The problem is simple: the longer the story becomes, the harder one prompt is to control.
A better approach is to break one idea into story structure, characters, scenes, and shots, review the storyboard first, and only then move into final generation. Movmix’s AI Long Video Generator is built around this kind of long-form workflow: start with a story idea and visual references, organize them into a clearer narrative, and then turn them into a connected video instead of a single isolated clip.
Start With One Story, Not Dozens of Shots
For this tutorial, we’ll use a simple mystery story:
A woman arrives at a lakeside hotel that has been closed for years to return an old film camera. After entering the hotel, she discovers that every photograph inside the camera was taken there—and the final image appears to have been created after she arrived.
The idea already has tension, but it is still too broad to generate directly.
Before thinking about individual shots, answer three questions.
Who is the main character?
A blonde woman wearing a dark green long coat and carrying a vintage film camera.
Where does the story happen?
An old hotel beside a remote lake.
What is the main change in the story?
She arrives simply to return the camera, but eventually discovers that the camera is somehow connected to her.
Once those elements are clear, the story can be structured.
Step 1: Build the Story Outline First
Don’t begin by planning dozens of shots. Start with a few major story stages.
| Story Stage | What Happens |
|---|---|
| Arrival | The main character reaches the lakeside hotel |
| Discovery | She enters the lobby and finds old hotel photographs |
| Clue | The photographs inside the camera match the hotel |
| Change | A new photograph appears inside the camera |
| Ending | She realizes the new image shows her in the hotel |
This gives the story a clear beginning, development, and ending.
If the outline itself does not work, beautiful AI footage will not fix it. You will simply end up with a collection of attractive shots instead of a complete story.
Step 2: Lock the Character Before Designing the Scenes
In long-form video, character consistency matters much more than it does in a single short clip.
For this project, we can first create a clean character reference.
| Character Reference Prompt | Output |
|---|---|
| 16:9 horizontal character reference image. A blonde European woman stands against a simple neutral gray studio background. She has natural facial features and medium-length blonde hair. She wears a dark green long coat over a beige knit top, dark trousers, and black ankle boots. A dark brown leather shoulder bag hangs at her side, and she holds a vintage black-and-silver film camera. Natural standing pose, front three-quarter view, clearly showing the character's appearance, clothing, hairstyle, bag, and camera. Soft natural lighting, realistic cinematic character reference photography, no text, no logo, no watermark. | 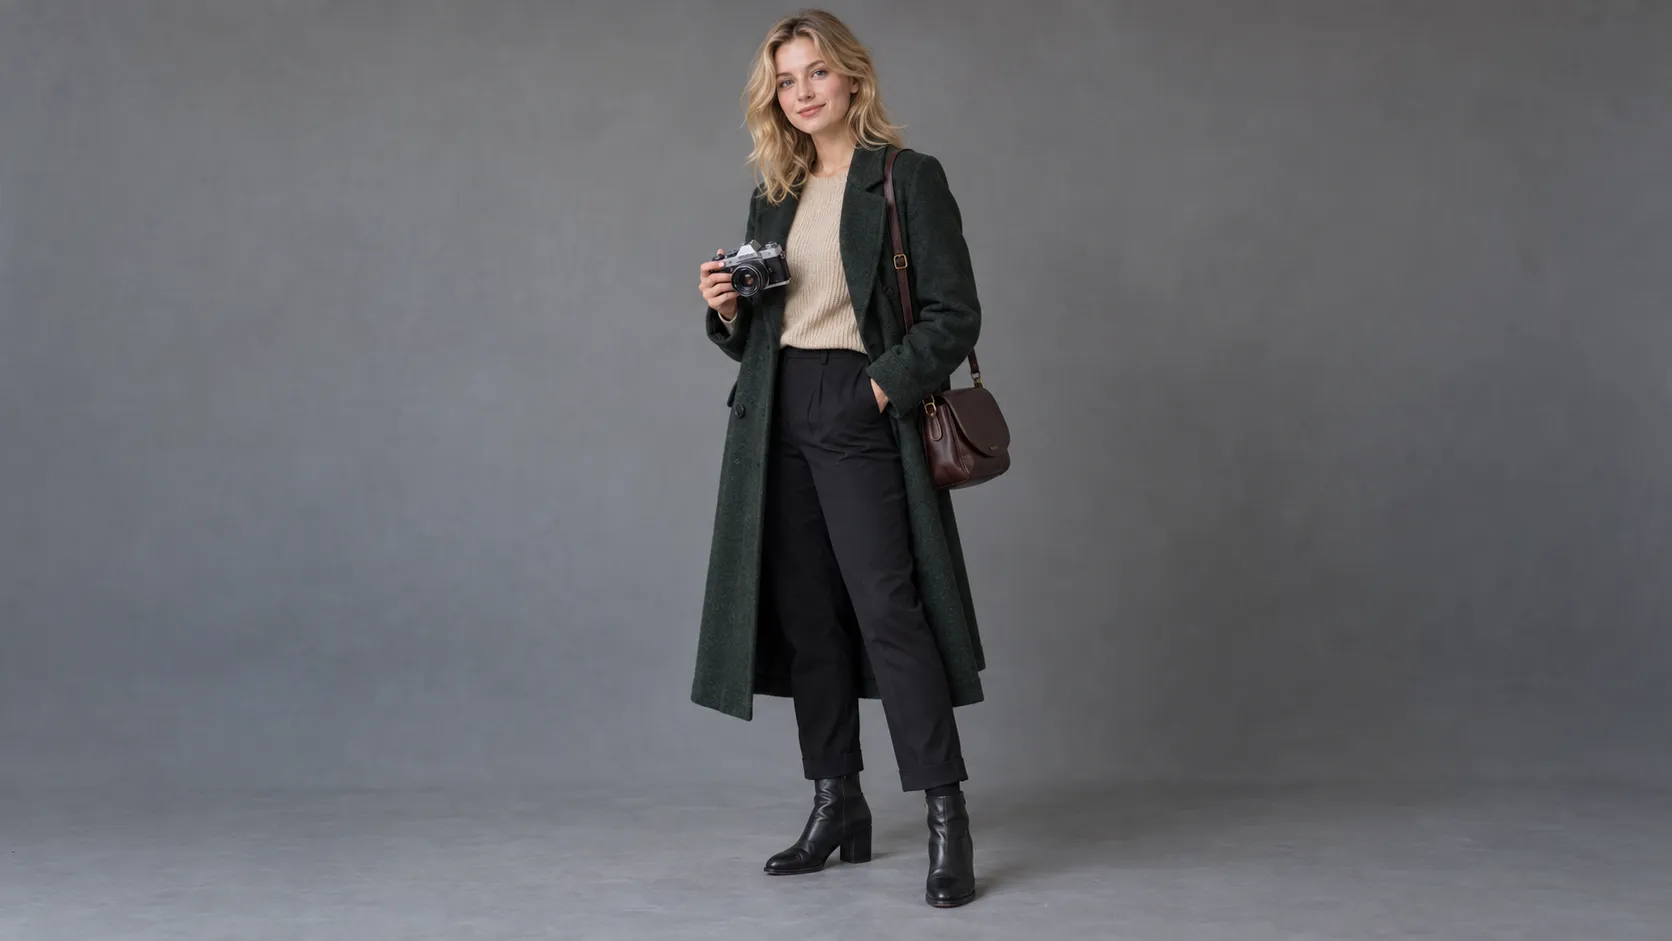 |
The lobby, hallway, and lakeside scenes should all continue using the same character appearance and the same outfit instead of redesigning her every time the location changes.
Step 3: Turn Story Stages Into Individual Scenes
Once the outline is ready, convert each major stage into a specific scene.
Scene 1: Hotel Exterior
The woman walks along the lakeside path and arrives at the hotel.
Scene 2: Lobby
She enters the lobby and places the camera on the old front desk.
Scene 3: Photo Wall
She notices that the old photographs on the wall match the images inside the camera.
Scene 4: Camera Close-Up
A new photograph appears that was not there before.
Scene 5: Final Reveal
The photograph shows her own figure standing inside the hotel lobby.
The important rule is simple:
Each scene should move the story forward with one clear purpose.
Don’t ask a single shot to handle entering the hotel, discovering the photographs, checking the camera, running upstairs, and revealing the ending all at once.
Image 1: Story Idea → Connected Scenes
| Prompt | Output |
|---|---|
| 16:9 horizontal cinematic story-planning concept image showing four connected scenes from the same lakeside hotel story. Scene 1: A blonde woman in a dark green long coat arrives outside an old lakeside hotel. Scene 2: The same woman enters the dim hotel lobby. Scene 3: She stands in front of an old photo wall while checking the film camera in her hands. Scene 4: She looks down at the camera while the deeper part of the hotel lobby remains visible behind her. Keep the same face, blonde hair, green coat, camera, and hotel design across all four scenes. Maintain consistent cool outdoor light and warm interior lighting. Present the scenes in a clean professional storyboard arrangement without complicated interface elements or large amounts of text. Realistic cinematic photography, refined mystery-film atmosphere, no logo, no watermark. | 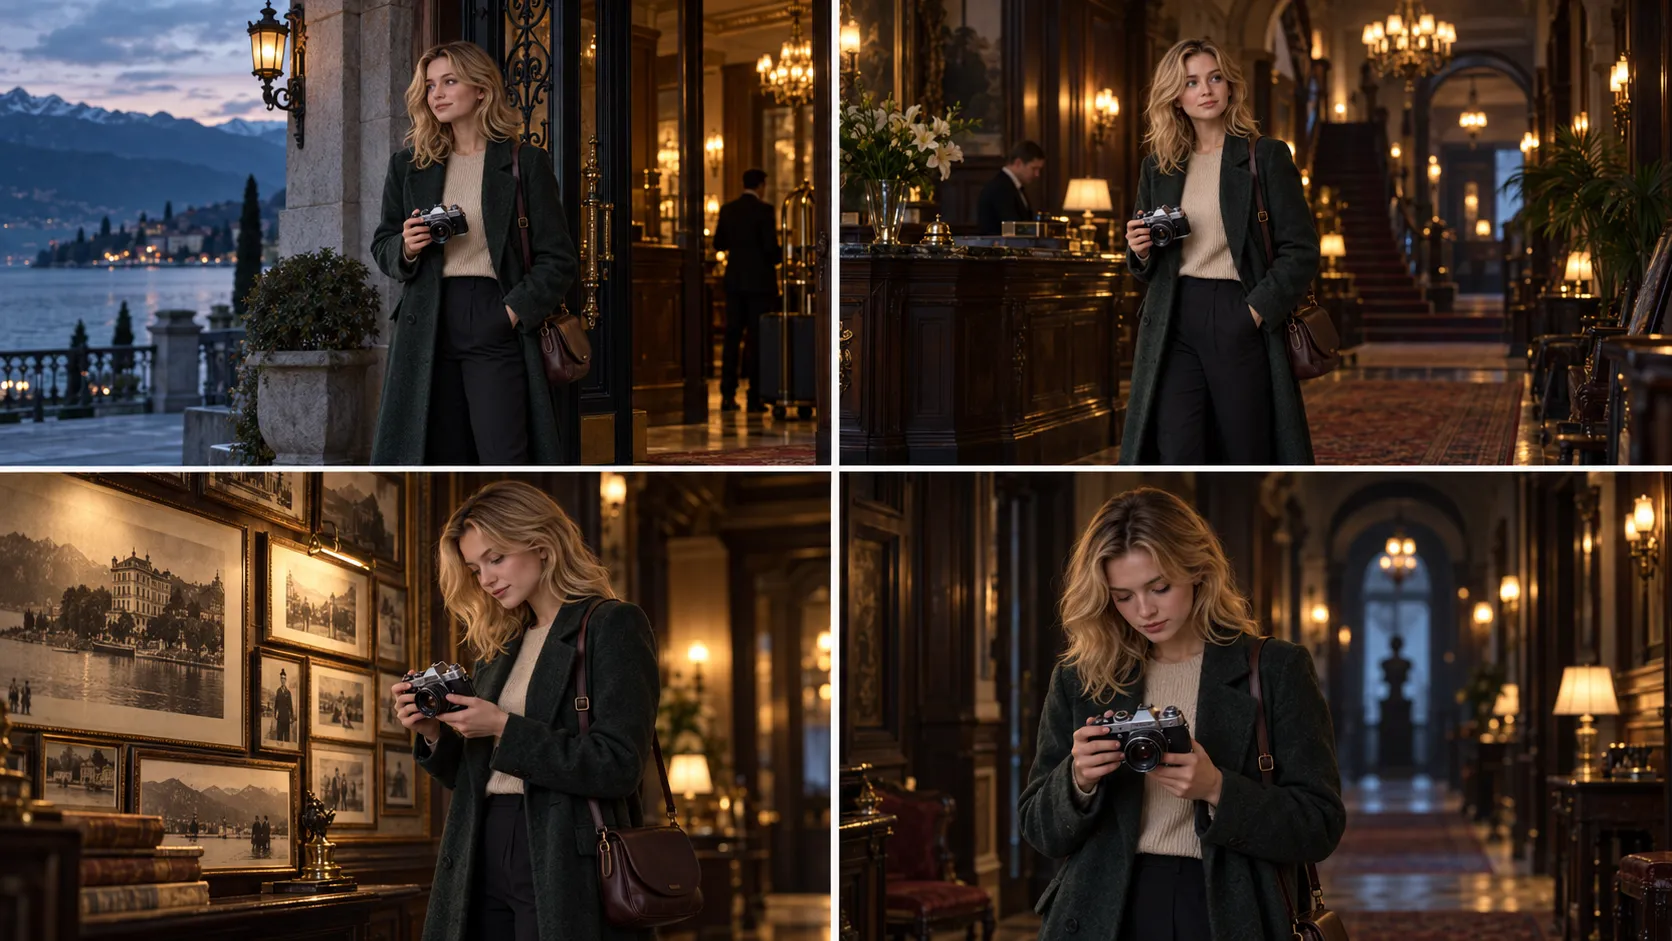 |
Step 4: Review the Storyboard Before Generating the Long Video
A storyboard is especially important for longer AI projects. It is not just a visual preview—it is a way to catch structural problems before spending time generating the full video.
Check whether the character suddenly changes clothes, whether the hotel layout still makes sense from one scene to the next, whether the film camera remains present, and whether the final reveal appears too early.
If something already looks wrong in the storyboard, fix it there first.
Correcting the story structure before generation is much more efficient than rebuilding the finished video afterward.
Step 5: Give Each Shot One Main Action
Once you move into video generation, the Video Prompt should remain focused.
For example, Scene 2 could use:
Continue naturally from the current first frame. The woman pushes open the old wooden door of the hotel lobby, slowly enters the room, walks forward a few steps, then stops beside the old wooden front desk and gently places the vintage film camera on the counter.
Keep the woman's face, blonde hair, dark green long coat, beige top, dark trousers, leather shoulder bag, and camera appearance unchanged.
The camera follows slowly from a rear three-quarter angle as she enters the lobby. Keep the hotel's interior architecture, warm yellow lighting, and overcast light outside the windows stable. Natural restrained movement, no additional people, no sudden shot change.
This shot only needs to do one thing:
Enter the hotel → place the camera on the desk.
The next story event belongs in the next scene.
That makes it easier to preserve the character, environment, and movement.
Reference Images Can Keep the Long Video Inside the Same World
A long-form story does not have to begin with text alone. If you already have character, environment, or prop references, those visual assets can help define the project.
For example:
Character Reference → Main character
Scene Reference → Lakeside hotel
Prop Reference → Vintage film camera
In the Movmix AI Long Video Generator, this approach is useful because the reference materials can establish what the world should look like, the storyboard organizes the story, and the Video Prompt controls specific actions.
Image 2: References → Long-Form Story
| Prompt | Output |
|---|---|
| 16:9 horizontal premium AI long-video workflow concept image. On the left, show three clean reference images: a blonde woman character reference, an old lakeside hotel environment reference, and a vintage black-and-silver film camera reference. On the right, show three connected cinematic scenes: the same woman arriving outside the hotel, entering the lobby, and checking the camera beside an old photo wall. Keep the woman's face, blonde hair, dark green coat, leather shoulder bag, and film camera identical across all three scenes. Maintain a consistent lakeside hotel architectural style and the same overcast cinematic lighting. Use a few simple thin lines or arrows to communicate “character reference + scene reference + prop reference → connected long-form story.” Combine realistic cinematic photography with clean professional information design. No complicated interface, no large amounts of text, no logo, no watermark. | 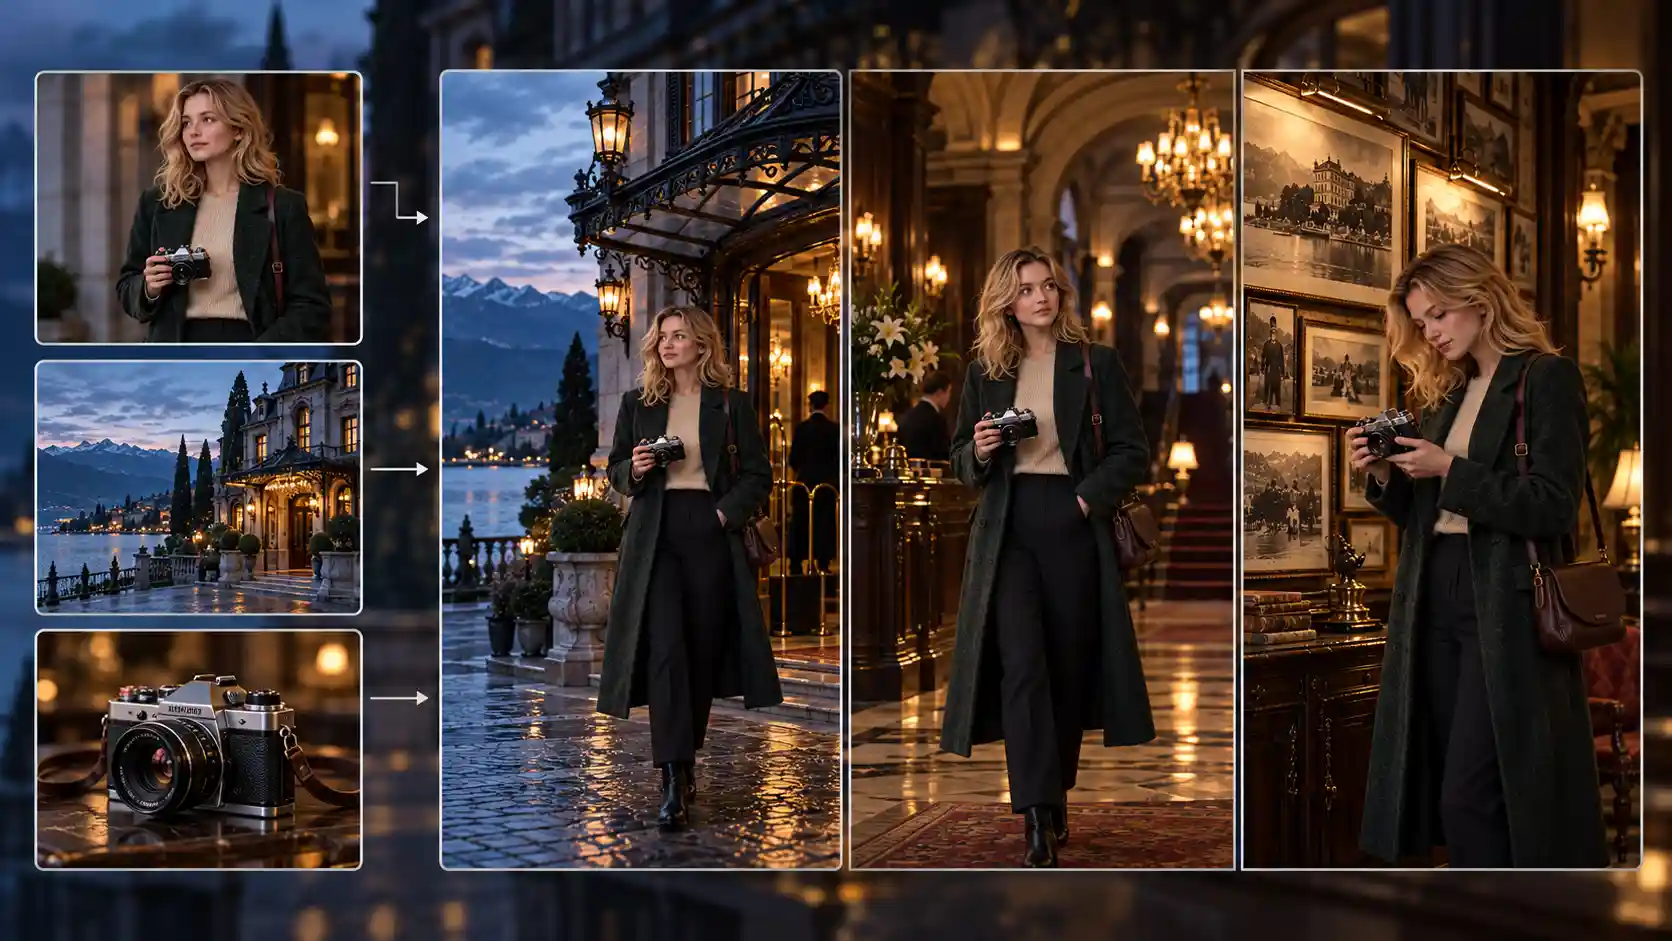 |
Final Thoughts: Design the Story Before You Generate the Long Video
A useful AI story video generator should do more than stretch a short-video prompt into a longer output. It should help answer the questions that actually make a story work: who is in it, where it happens, what each scene needs to accomplish, what must remain consistent, and how one scene should lead into the next.
If this is your first long-form AI video, keep the project simple. Start with one main character, one core location, and one clear mystery or goal, then work through:
Story Idea → Outline → Characters → Scenes → Storyboard → Long Video
When the story is ready, open the Movmix AI Long Video Generator and begin building the complete video from your story and reference materials.
Make the story work first. Then turn it into a long video.
'%3e%3crect%20y='2.1906'%20width='26'%20height='17.4314'%20rx='1.55981'%20fill='white'/%3e%3c/g%3e%3crect%20x='0.311961'%20y='2.50256'%20width='25.3761'%20height='16.8075'%20rx='1.24784'%20stroke='%2322257C'%20stroke-width='0.623922'/%3e%3c/g%3e%3crect%20x='13.078'%20y='15.5656'%20width='10.8016'%20height='2.49569'%20rx='0.623922'%20fill='%2366B3FF'%20stroke='%2322257C'%20stroke-width='0.623922'/%3e%3crect%20x='-0.311961'%20y='0.311961'%20width='10.8016'%20height='2.49569'%20rx='0.623922'%20transform='matrix(-1%200%200%201%2012.61%2015.2536)'%20fill='%2366B3FF'%20stroke='%2322257C'%20stroke-width='0.623922'/%3e%3crect%20x='10.3093'%20y='13.3231'%20width='4.91339'%20height='6.98013'%20rx='2.45669'%20fill='%2322257C'/%3e%3cpath%20d='M18.9174%200.31543C20.5962%200.268025%2022.1261%200.655527%2023.9487%201.55762C24.0483%201.60695%2024.1137%201.71153%2024.1137%201.8291V16.502C24.1137%2016.7236%2023.8763%2016.891%2023.6499%2016.7979C21.803%2016.0377%2020.2158%2015.6963%2018.4975%2015.7705C16.8915%2015.8399%2015.1907%2016.2732%2013.0776%2017.0332V1.6709C15.4678%200.825877%2017.2746%200.36187%2018.9174%200.31543Z'%20fill='white'%20stroke='%2322257C'%20stroke-width='0.623922'/%3e%3cpath%20d='M15.3008%204.57C16.3536%203.94578%2019.2783%203.20503%2021.8909%203.94608'%20stroke='%2366B3FF'%20stroke-width='0.935883'%20stroke-linecap='round'/%3e%3cpath%20d='M15.3008%207.26054C16.3536%206.63631%2019.2783%205.89557%2021.8909%206.63661'%20stroke='%2366B3FF'%20stroke-width='0.935883'%20stroke-linecap='round'/%3e%3cpath%20d='M15.3008%209.95107C16.3536%209.32684%2019.2783%208.5861%2021.8909%209.32714'%20stroke='%2366B3FF'%20stroke-width='0.935883'%20stroke-linecap='round'/%3e%3cpath%20d='M15.3008%2012.6398C16.3536%2012.0156%2019.2783%2011.2749%2021.8909%2012.0159'%20stroke='%2366B3FF'%20stroke-width='0.935883'%20stroke-linecap='round'/%3e%3cpath%20d='M7.08257%200.31543C5.40384%200.268025%203.87393%200.655527%202.05132%201.55762C1.95165%201.60695%201.88628%201.71153%201.88628%201.8291V16.502C1.88628%2016.7236%202.12373%2016.891%202.35014%2016.7979C4.19702%2016.0377%205.78418%2015.6963%207.50249%2015.7705C9.10852%2015.8399%2010.8093%2016.2732%2012.9224%2017.0332V1.6709C10.5322%200.825877%208.72541%200.36187%207.08257%200.31543Z'%20fill='white'%20stroke='%2322257C'%20stroke-width='0.623922'/%3e%3cpath%20d='M10.6992%204.57C9.64638%203.94578%206.72175%203.20503%204.10907%203.94608'%20stroke='%2366B3FF'%20stroke-width='0.935883'%20stroke-linecap='round'/%3e%3cpath%20d='M10.6992%207.26054C9.64638%206.63631%206.72175%205.89557%204.10907%206.63661'%20stroke='%2366B3FF'%20stroke-width='0.935883'%20stroke-linecap='round'/%3e%3cpath%20d='M10.6992%209.95107C9.64638%209.32684%206.72175%208.5861%204.10907%209.32714'%20stroke='%2366B3FF'%20stroke-width='0.935883'%20stroke-linecap='round'/%3e%3cpath%20d='M10.6992%2012.6398C9.64638%2012.0156%206.72175%2011.2749%204.10907%2012.0159'%20stroke='%2366B3FF'%20stroke-width='0.935883'%20stroke-linecap='round'/%3e%3c/g%3e%3cdefs%3e%3cfilter%20x='0'%20y='2.1906'%20width='26'%20height='17.4314'%20filterUnits='userSpaceOnUse'%20color-interpolation-filters='sRGB'%3e%3cfeFlood%20flood-opacity='0'%20result='BackgroundImageFix'/%3e%3cfeBlend%20mode='normal'%20in='SourceGraphic'%20in2='BackgroundImageFix'%20result='shape'/%3e%3cfeColorMatrix%20in='SourceAlpha'%20type='matrix'%20values='0%200%200%200%200%200%200%200%200%200%200%200%200%200%200%200%200%200%20127%200'%20result='hardAlpha'/%3e%3cfeOffset%20dy='-1.24784'/%3e%3cfeComposite%20in2='hardAlpha'%20operator='arithmetic'%20k2='-1'%20k3='1'/%3e%3cfeColorMatrix%20type='matrix'%20values='0%200%200%200%200.572549%200%200%200%200%200.768627%200%200%200%200%200.976471%200%200%200%201%200'/%3e%3cfeBlend%20mode='normal'%20in2='shape'%20result='effect1_innerShadow_0_4'/%3e%3c/filter%3e%3c/defs%3e%3c/svg%3e)