The best thing about image-to-image is that it does not ask AI to start from scratch.
Instead, you tell it:
Keep this. Change that.
If you already have a decent portrait, product shot, room photo, or pet photo, there is no need to reroll everything. Just upload it to Movmix Image to Image and tell the model what should stay and what should change.
Here are 15 practical examples.
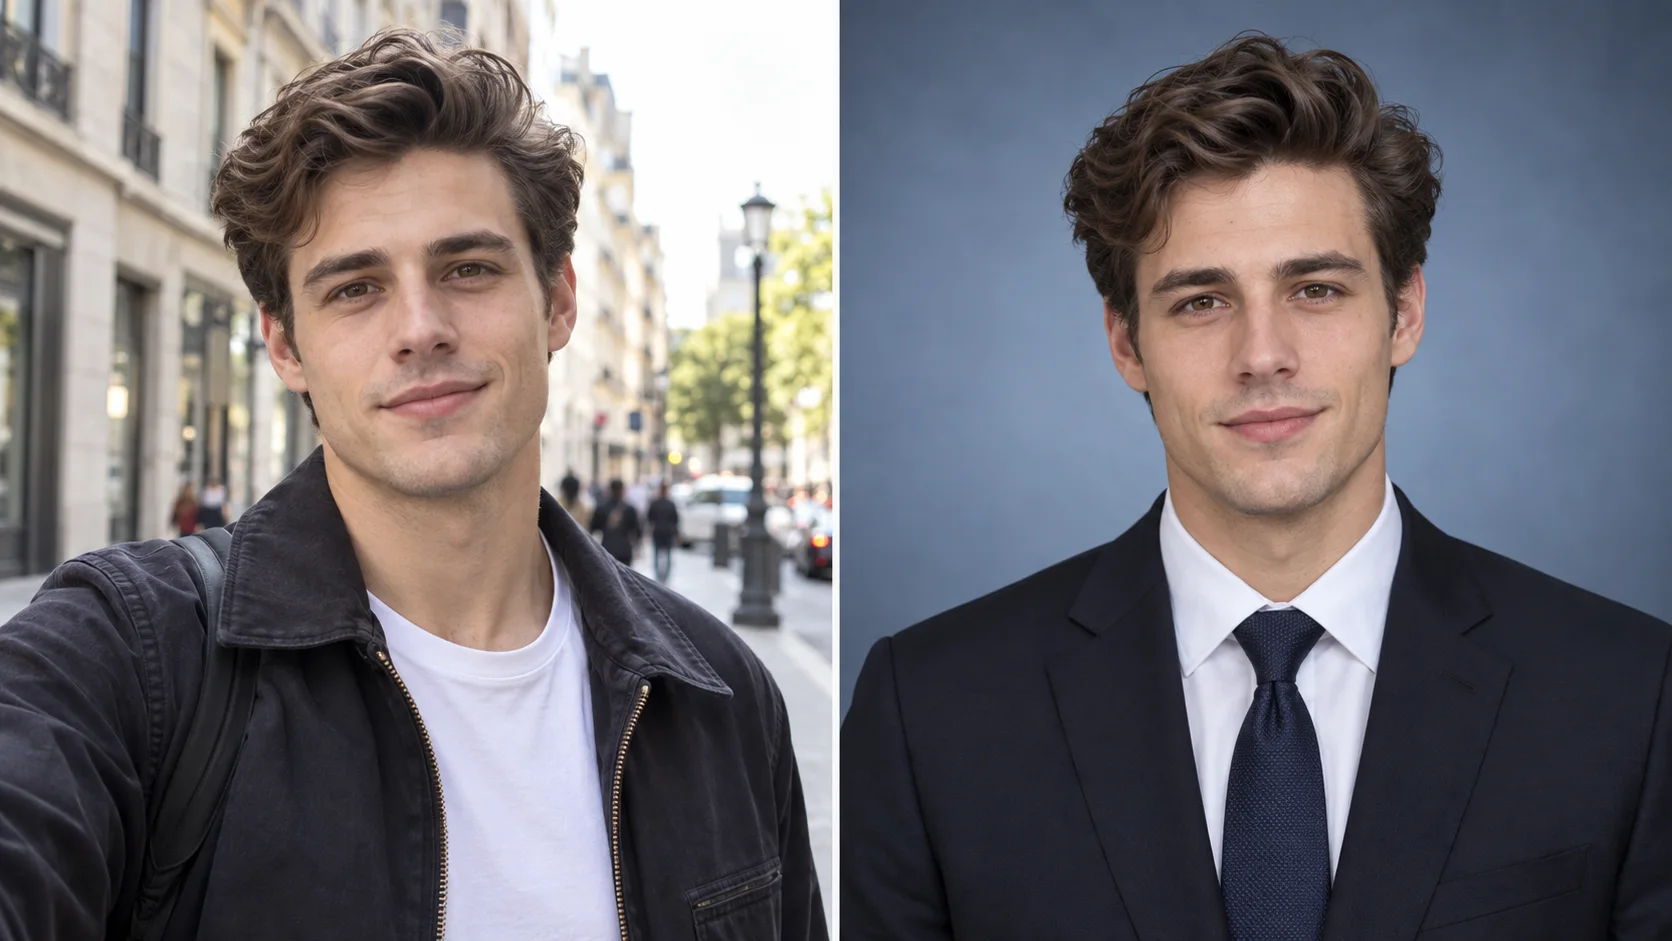
1. Casual Photo of a Young Man → American-Style Professional ID Portrait
This kind of source image already has a strong face and a clean base, so it works well for a professional portrait transformation.
Keep the original person’s facial features and identity unchanged. Transform this photo into an American-style professional ID portrait. The subject is a handsome polished young Western man, facing the camera with a natural confident expression, neat hairstyle, and wearing a dark formal suit jacket or a clean professional top. Change the background to a clean soft blue-gray studio backdrop with even soft lighting. Keep the face sharp and clear, and use a chest-up or upper-body composition. The final result should look realistic, refined, and professional.
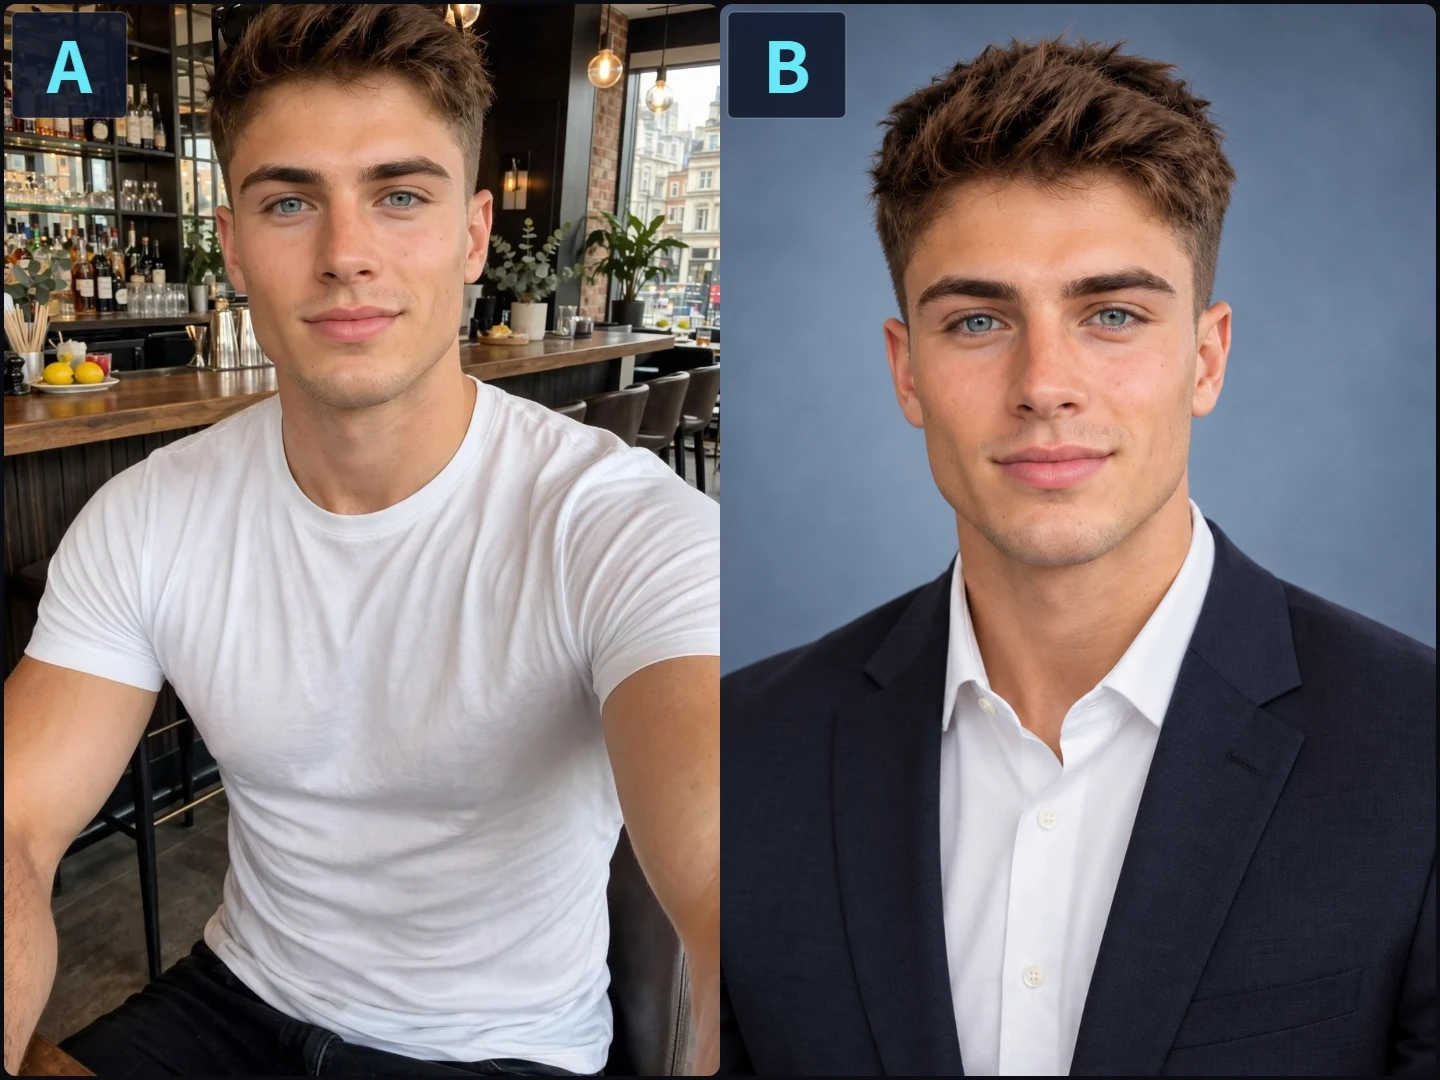
What it does: Turns a casual portrait with an everyday background into a clean, professional American-style portrait while keeping the same person.
Best for: LinkedIn, resumes, company websites, team pages, professional profiles.
Watch out: This is an ID-photo style transformation, not a replacement for official passport or government ID requirements. If you want to preserve the person, clearly include same face and identity.
2. Stylish Male Portrait → High-End Fashion Editorial
The original image already has strong facial structure, so it can easily be pushed into a fashion-editorial direction.
Keep the original person’s facial features, face shape, and identity unchanged. Transform this image into a high-end fashion editorial portrait. The subject remains the same handsome polished young Western man with blue eyes and defined facial features. Update the styling into a more elevated black or dark fashion look, with a minimal studio or dark fashion background, dramatic yet refined studio lighting, and a premium menswear campaign feel. Realistic photography, polished, striking, and stylish.
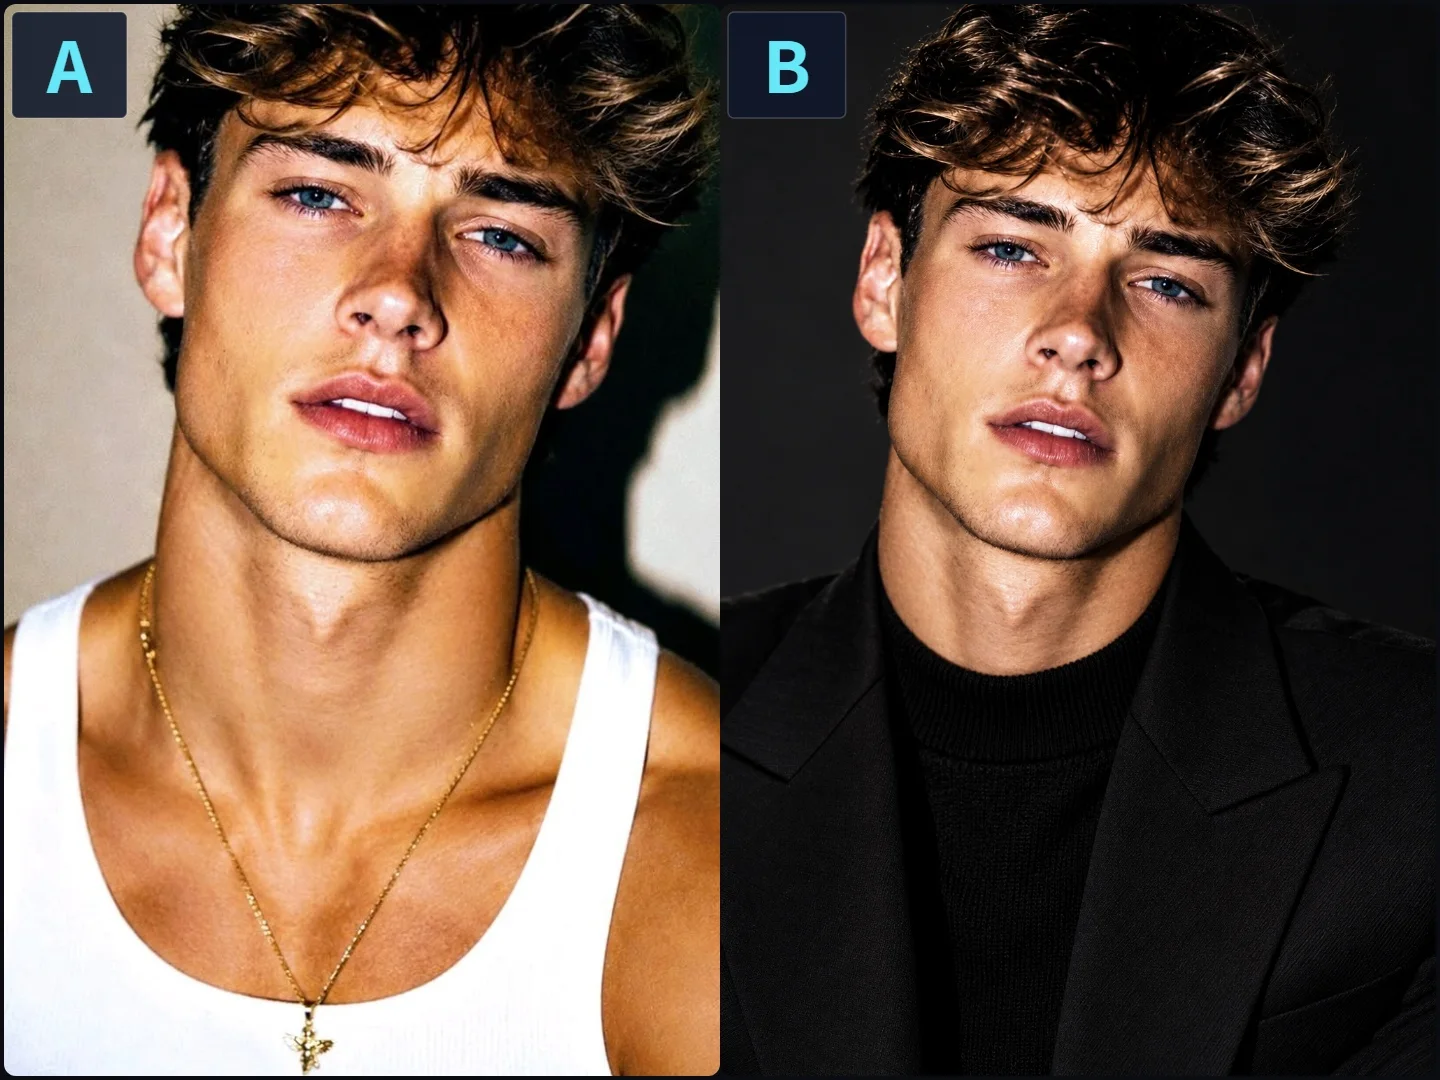
What it does: Keeps the same person but upgrades the styling, background, and lighting into a more polished fashion-editorial look.
Best for: Fashion portraits, personal branding, model portfolios, social media covers, brand visuals.
Watch out: Don’t change the face, hairstyle, outfit, pose, and background all at once. Change too much, and the final image may only have “handsome guy” in common with the original.
3. Casual Indoor Selfie → Clean LinkedIn Headshot
The selfie is good, but too casual. A professional headshot makes it much more useful.
Keep the original person’s facial features, hairstyle, and identity unchanged. Transform this image into a clean professional LinkedIn-style headshot. The subject is the same young Western woman, wearing neat business casual clothing or a blazer. Change the background to a clean soft gray or light blue-gray studio backdrop, with natural even lighting and a confident, friendly expression. Use a chest-up or upper-body composition. The final image should look realistic, polished, and professional.
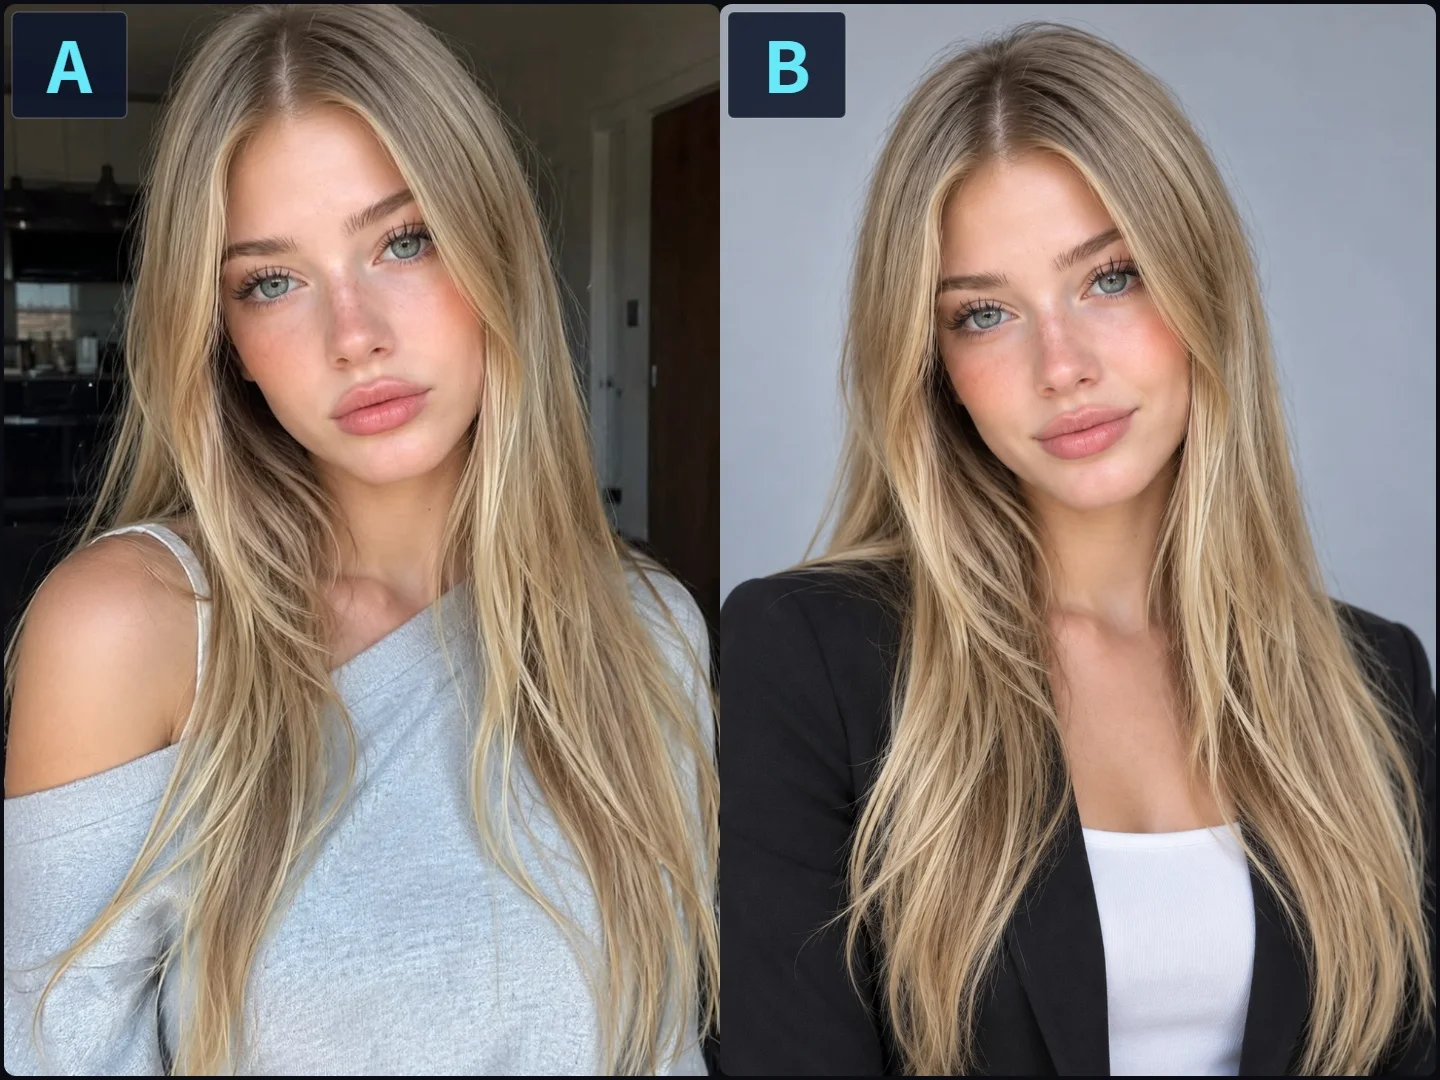
What it does: Cleans up the casual feel of a selfie and turns it into a more reliable professional portrait.
Best for: LinkedIn, resumes, personal websites, company directories, speaker profiles.
Watch out: Professional does not mean “expressionless board meeting face.” A natural, friendly expression usually works better.
4. Outdoor Portrait of a Woman → New Outfit
This is a very practical use case. Keep the face, change the outfit.
Keep the original person’s facial features, face shape, hairstyle, and identity unchanged. Keep the outdoor setting and general composition, but change the subject’s outfit into a more stylish fashion look, such as a beige trench coat, white inner top, and dark trousers. Maintain a natural standing pose and realistic photography style with clean clothing details and natural lighting.
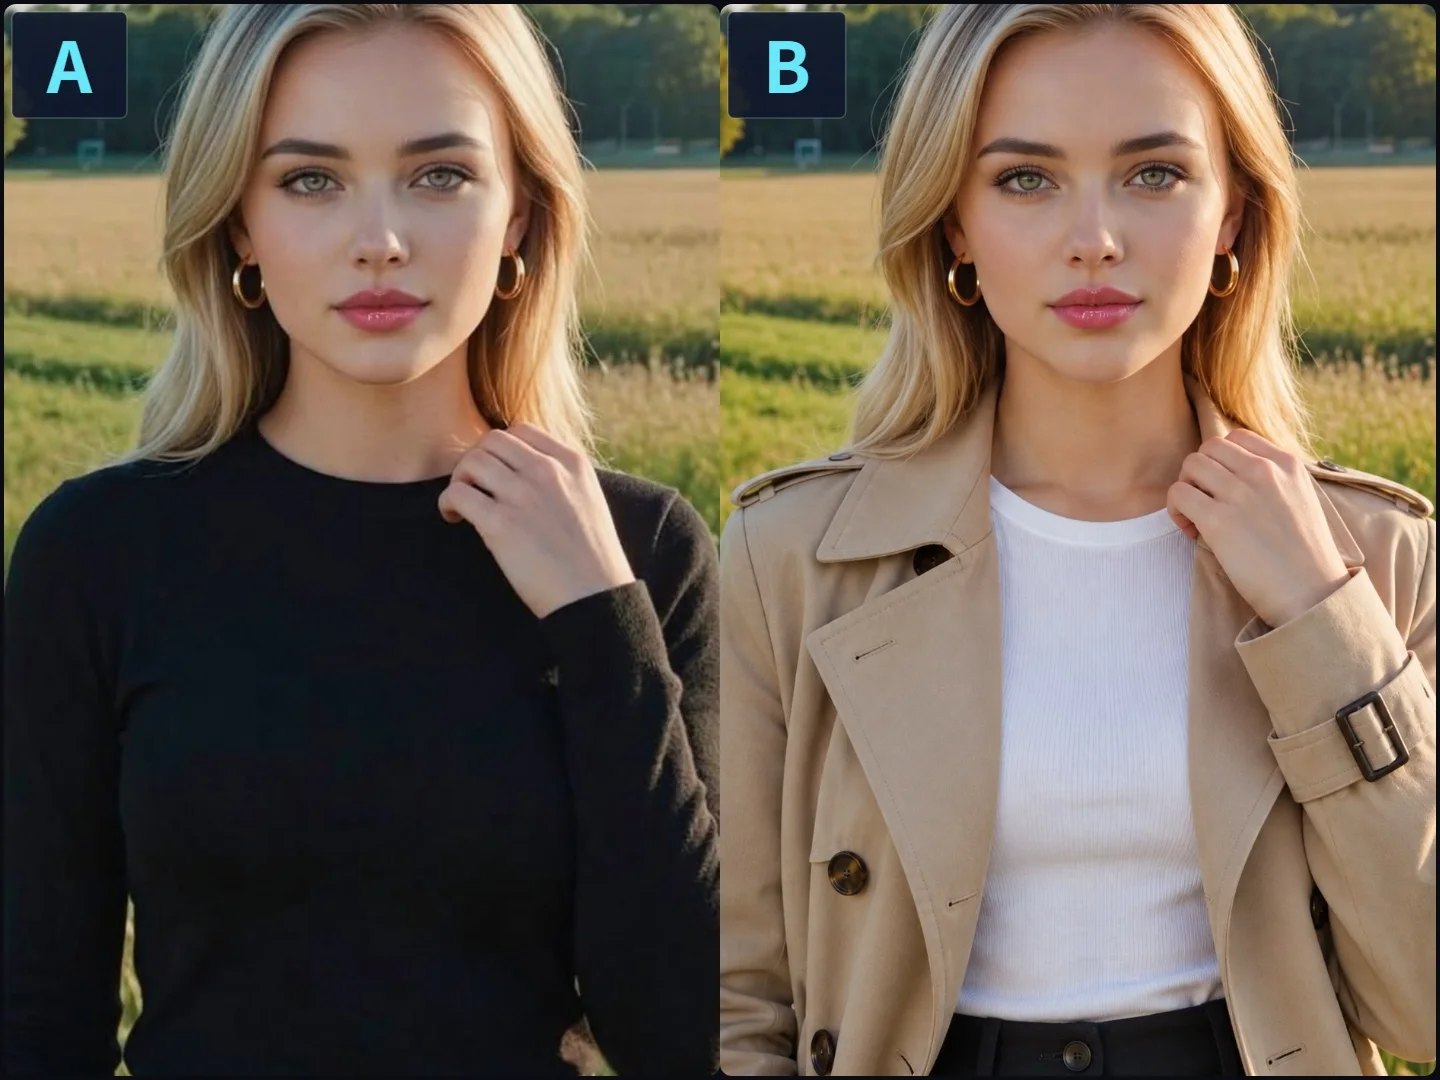
What it does: Lets you preview a new outfit on the same person without taking another photo.
Best for: Outfit previews, fashion e-commerce, personal styling tests, social content, wardrobe inspiration.
Watch out: If you only want to change the clothes, tell the model to preserve face, pose, body shape, and background. Otherwise, the outfit change may come with a free replacement model.
5. Indoor Female Portrait → New Hairstyle and Hair Color
If you want to test new hairstyles, there is no need to create a whole new person.
Keep the original person’s facial features, face shape, identity, and outfit unchanged. Only change the hairstyle and hair color. Transform the long straight blonde hair into a more refined medium-length layered style or soft collarbone-length hair, and change the hair color to light brown or cool ash blonde. Keep the indoor soft lighting and realistic portrait-photography feel.
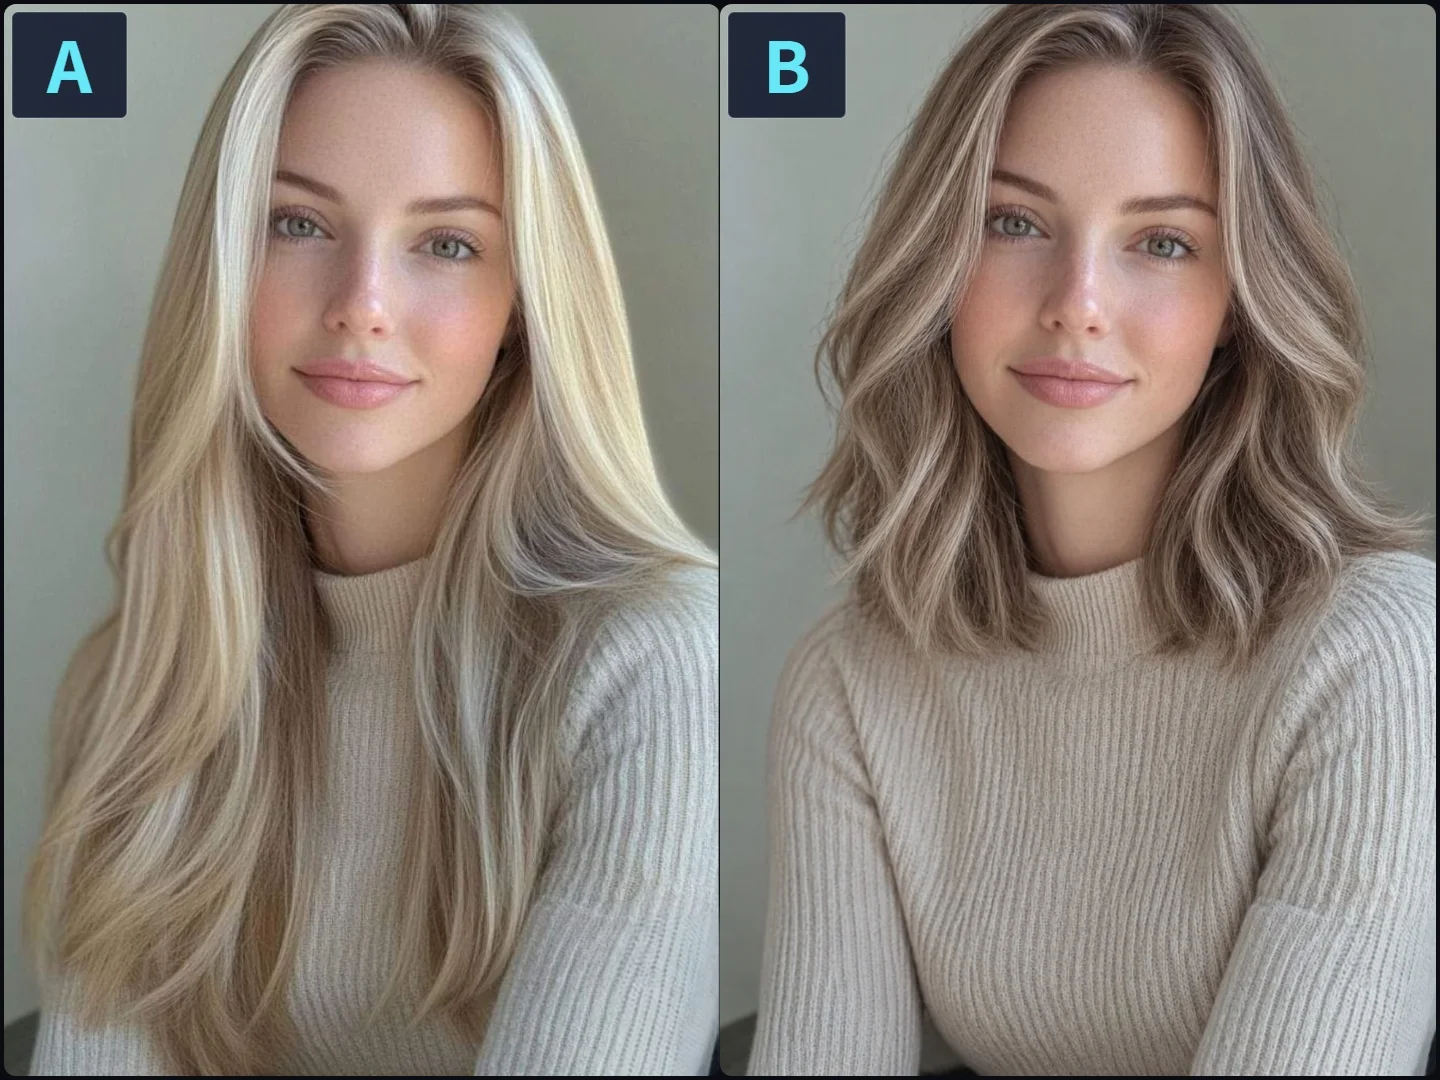
What it does: Lets you test a different haircut or hair color before actually changing your hair.
Best for: Hairstyle previews, hair-color tests, beauty content, personal styling, before-and-after posts.
Watch out: If you are testing hair, avoid changing the makeup and face shape at the same time. Fewer variables make the comparison more useful.
6. Basic Skincare Product Photo → Premium Ad Shot
This is a great example for product-image upgrades.
Keep the original product shape, bottle proportions, and core design unchanged. Transform this basic product shot into a premium skincare advertising image. Place the bottle on a light stone platform, add a few green leaves and subtle water droplets around it, keep the background clean and natural, and use soft high-end lighting. The final result should look like a luxury skincare campaign image.
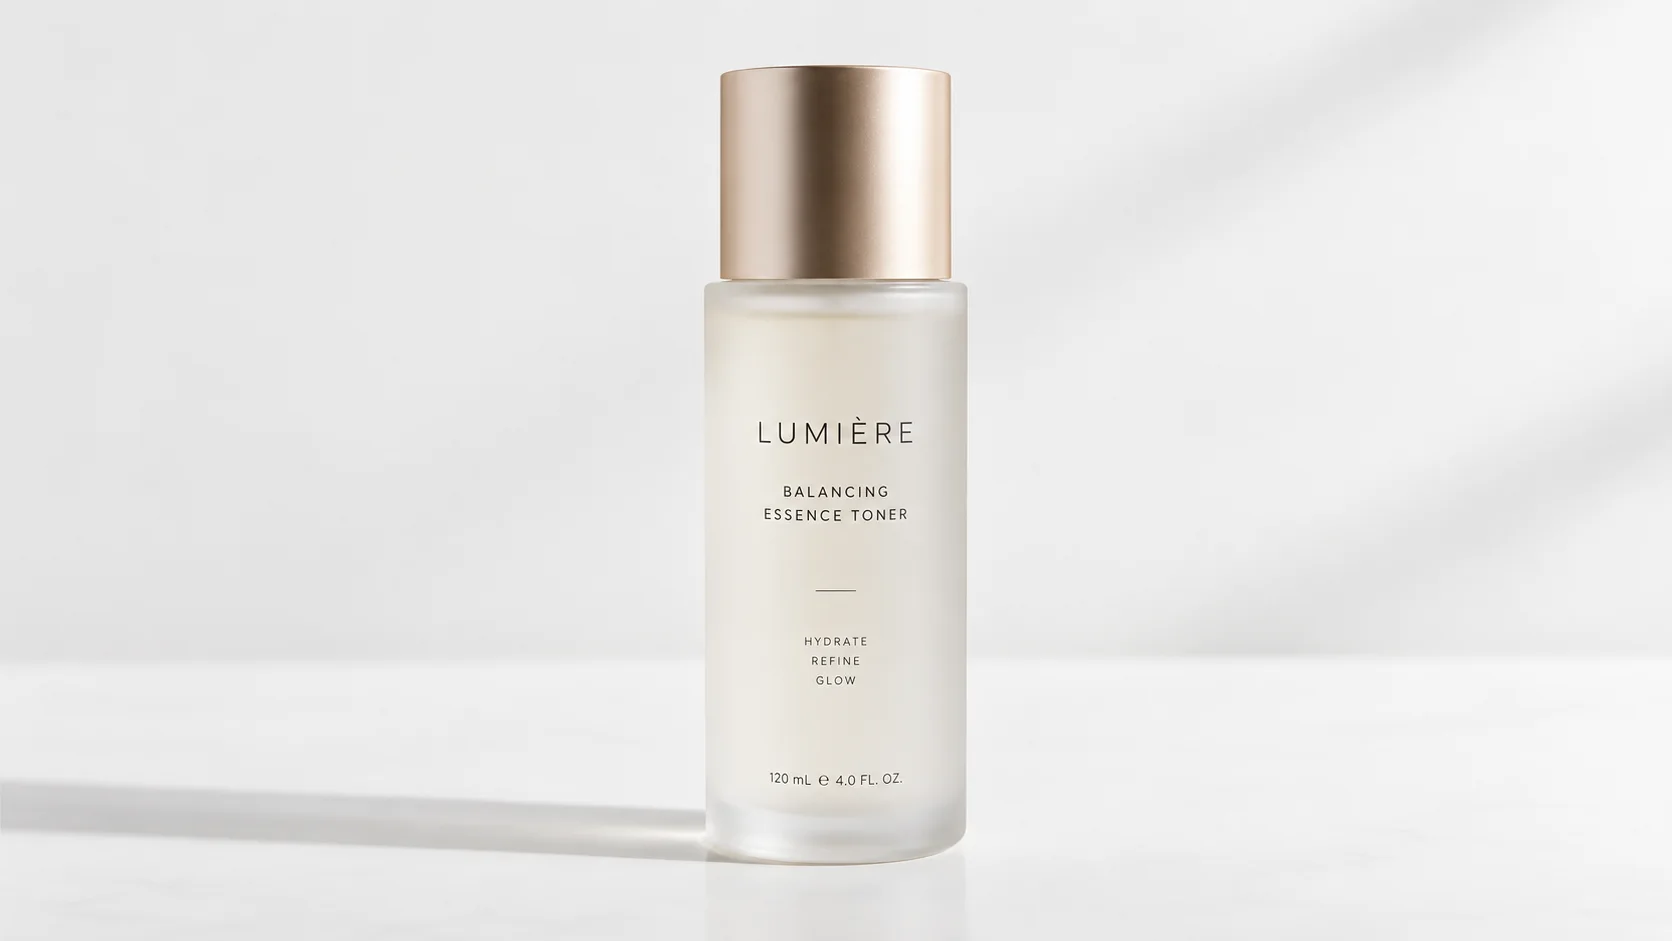
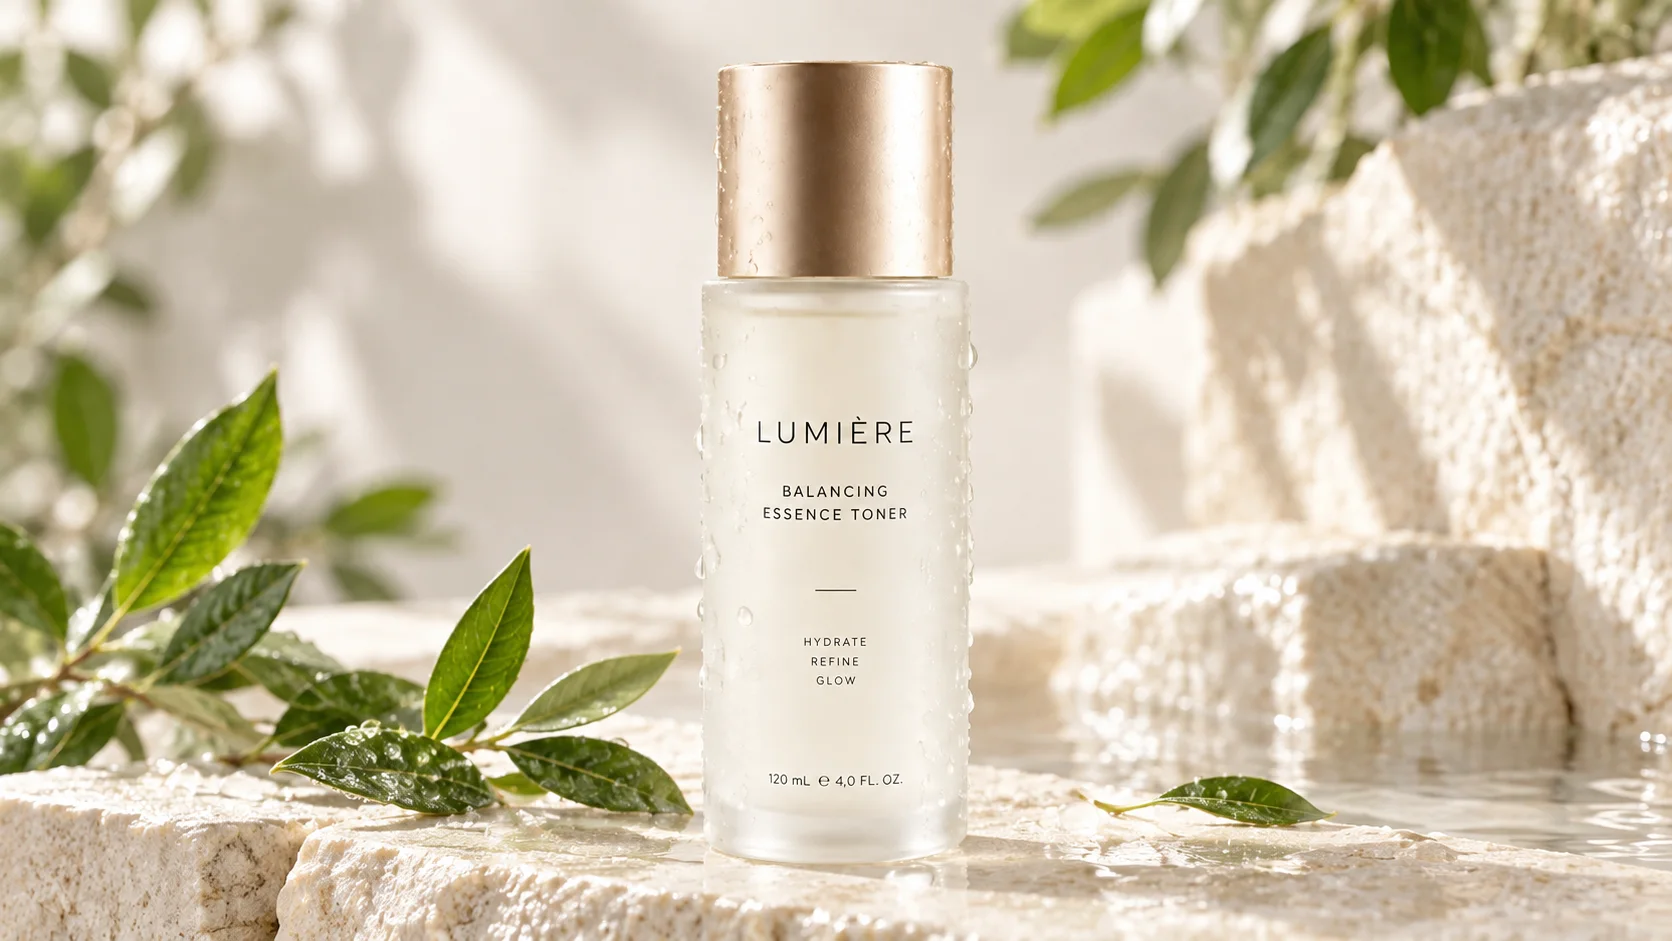
What it does: Upgrades a plain product photo into a more polished commercial advertising image.
Best for: E-commerce, social ads, landing pages, product campaigns, brand visuals.
Watch out: The first rule of product image editing is simple: do not change the product. If the bottle shape, cap, proportions, or color drift, it may look great — but it is now a different product.
7. Black Headphones → Cream White Version
This is perfect for testing color variations of the same product.
Keep the original headphones design, structure, button placement, and proportions unchanged. Only change the product color. Transform the black wireless headphones into a cream white or warm ivory version. Keep the original camera angle, background, and lighting, and make the result look realistic and suitable for a product color variation display.
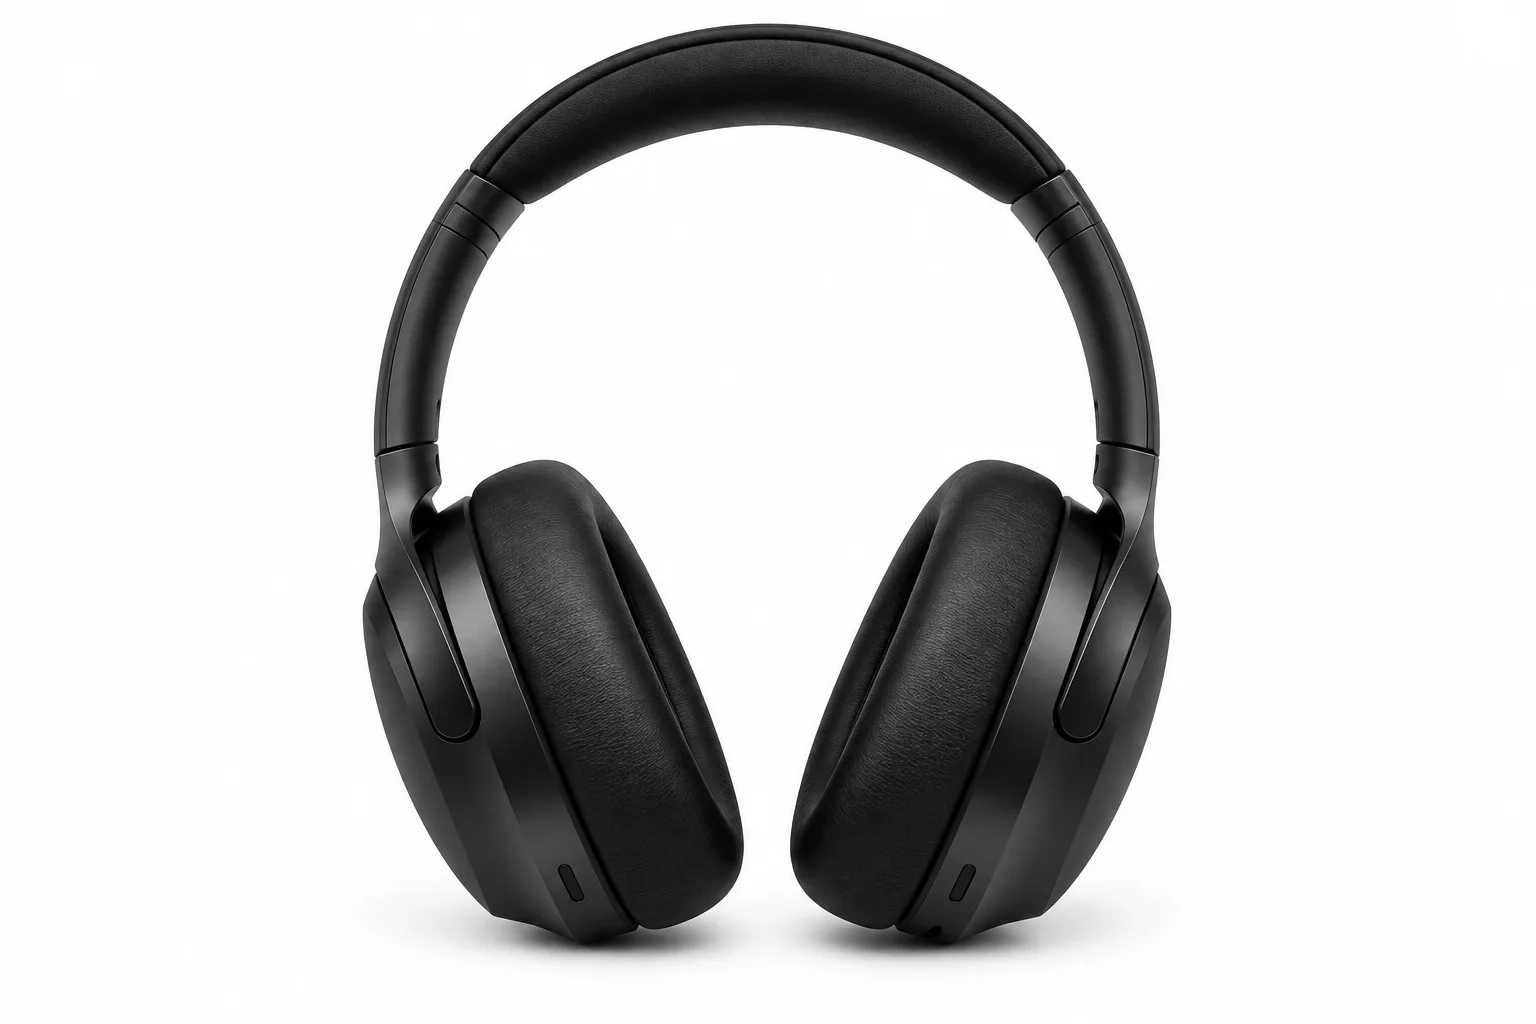
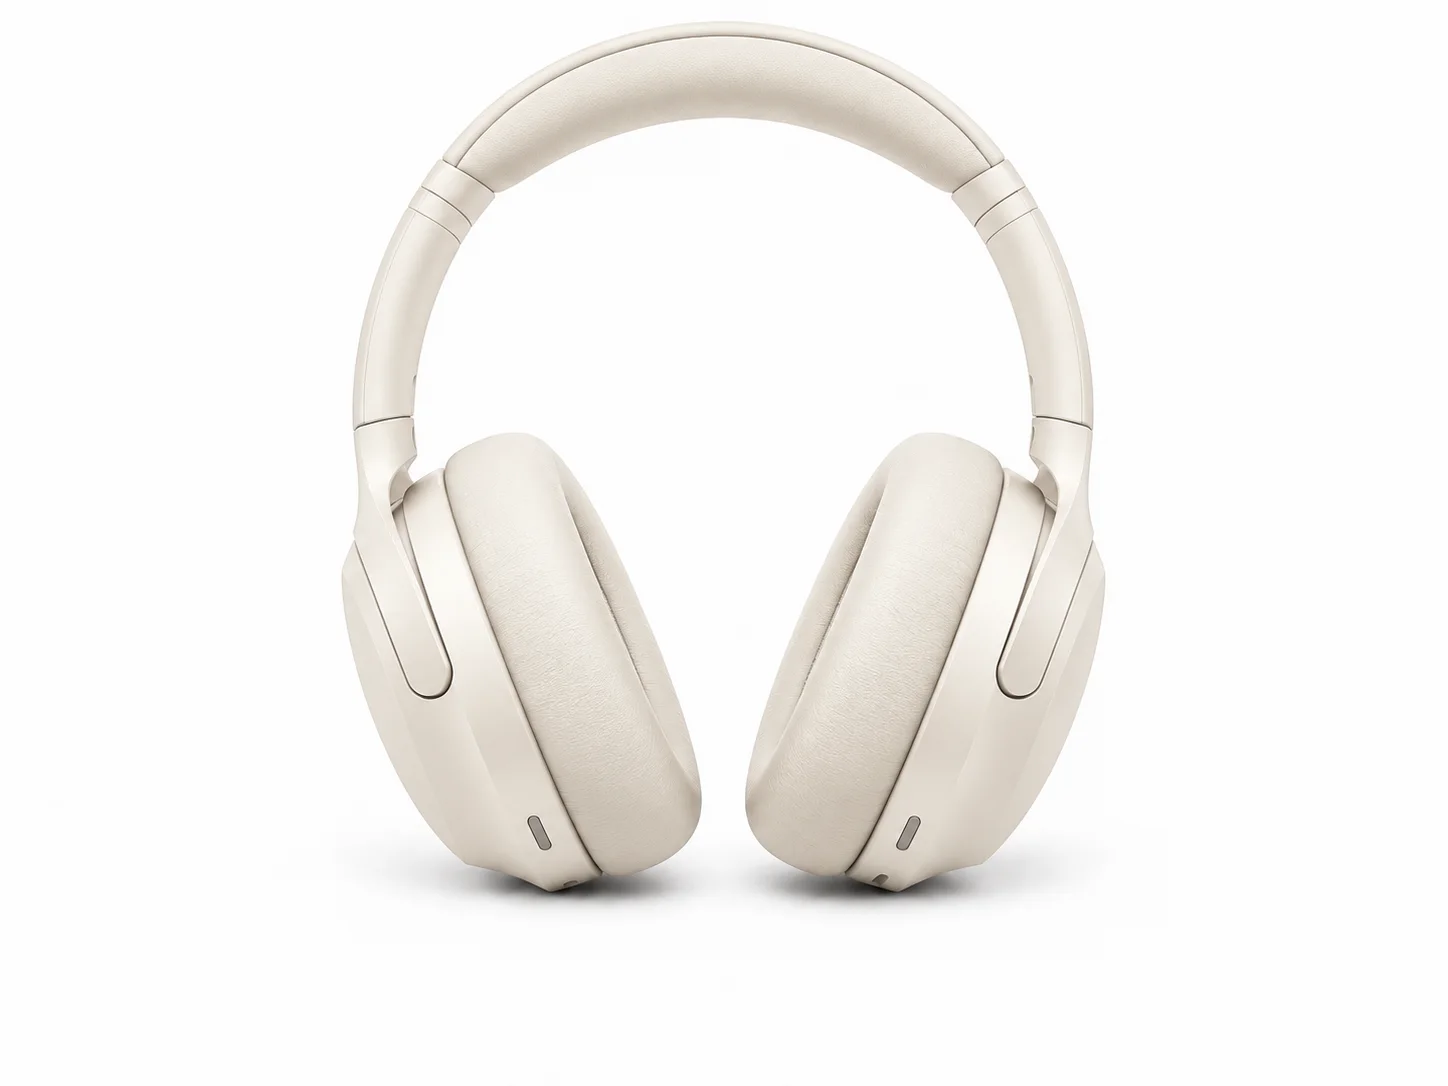
What it does: Quickly tests a new color version of the same product without another photoshoot.
Best for: Product color testing, SKU previews, product proposals, market research, ad assets.
Watch out: If you only want to change the color, explicitly say change only the color. Otherwise, the AI may decide the headphones also need a redesign.
8. Basic Living Room Photo → Japandi Interior
Interior redesign is one of the most useful image-to-image cases.
Keep the original room layout, walls, windows, and camera angle unchanged. Redesign the living room in a warm Japandi style with light wood furniture, soft beige fabrics, minimalist decor, ceramic accents, and clean neutral tones. Keep the result warm, simple, and realistic, like a professionally photographed interior design image.
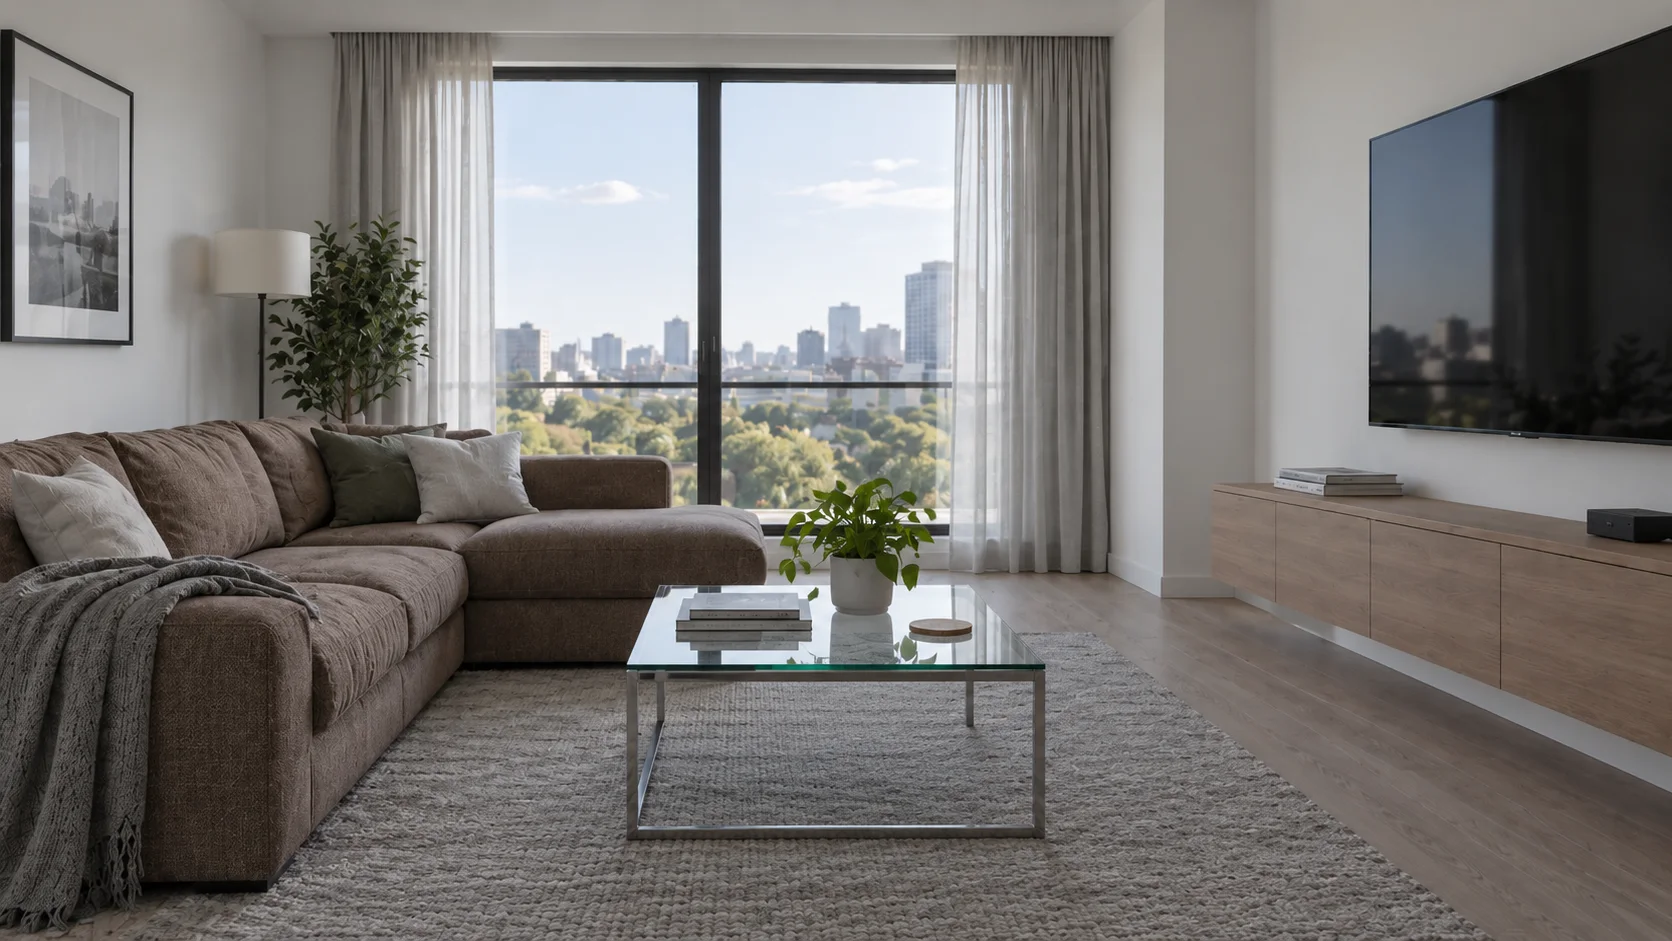
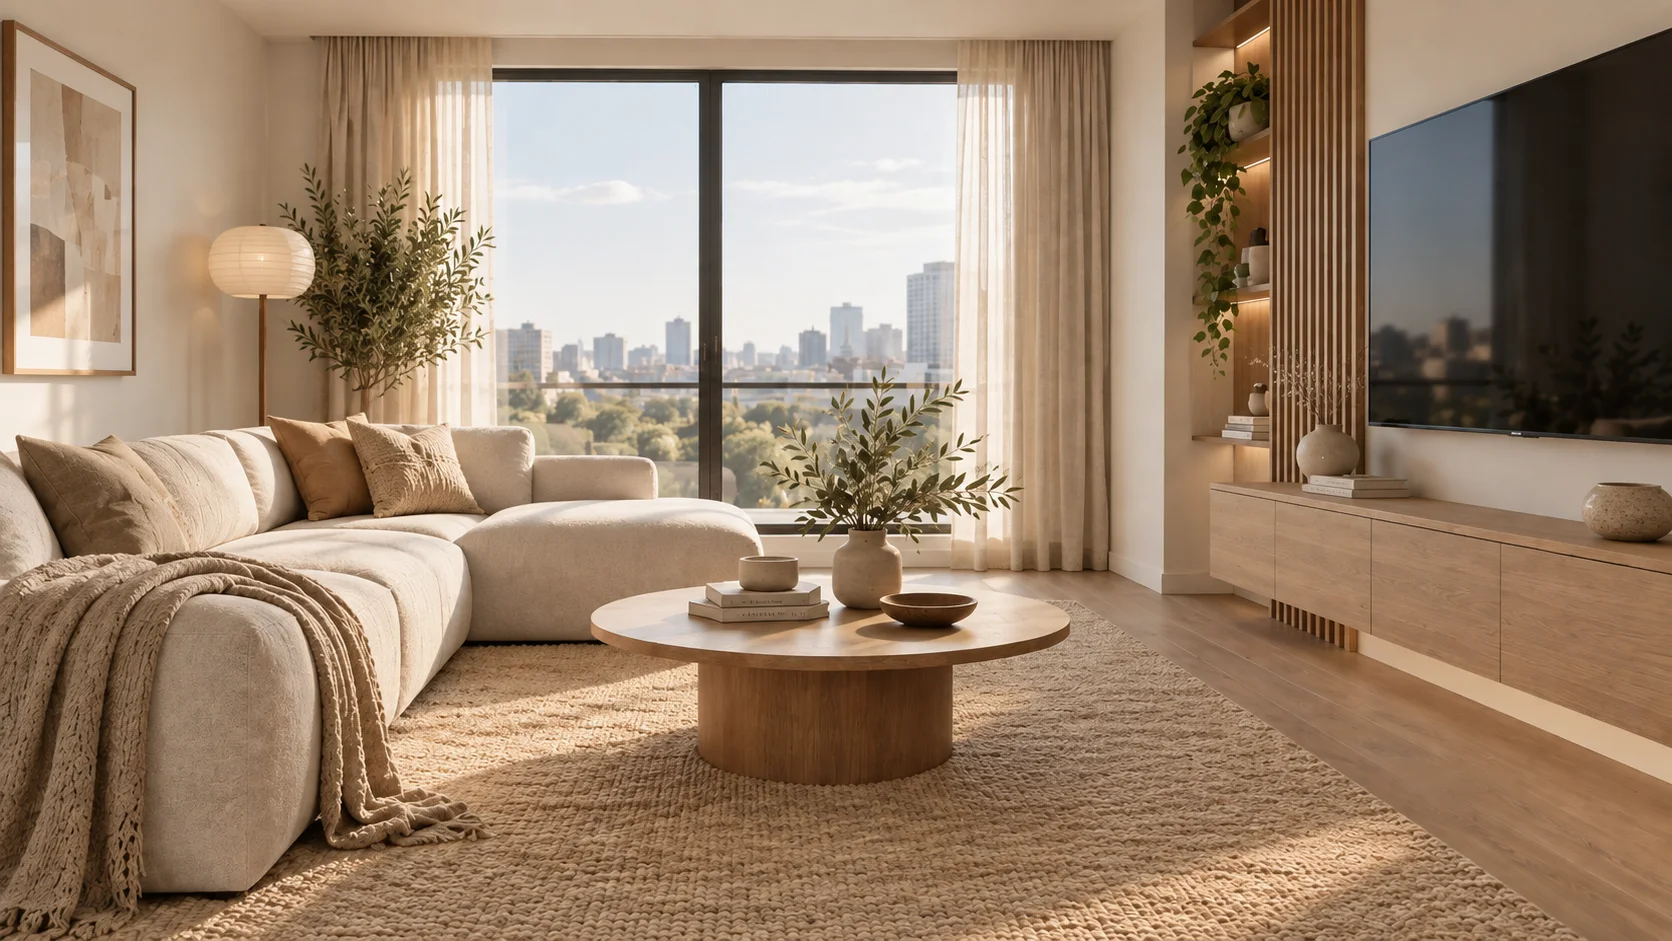
What it does: Keeps the room layout while changing the furniture, materials, and overall interior style.
Best for: Interior design, renovation ideas, real-estate visuals, home content, design proposals.
Watch out: Clearly preserve layout, windows, walls, and camera angle. Otherwise, the AI’s redesign may casually include removing a wall.
9. Hand-Drawn Lamp Sketch → Real Product Render
Sketch-to-product is one of the most practical uses of image-to-image.
Keep the original lamp silhouette and design proportions unchanged. Transform this hand-drawn sketch into a realistic product render. Use brushed metal and frosted glass materials, place it on a clean studio surface, and light it with soft natural product-photography lighting. The final result should look like a real manufactured product or a premium product render.
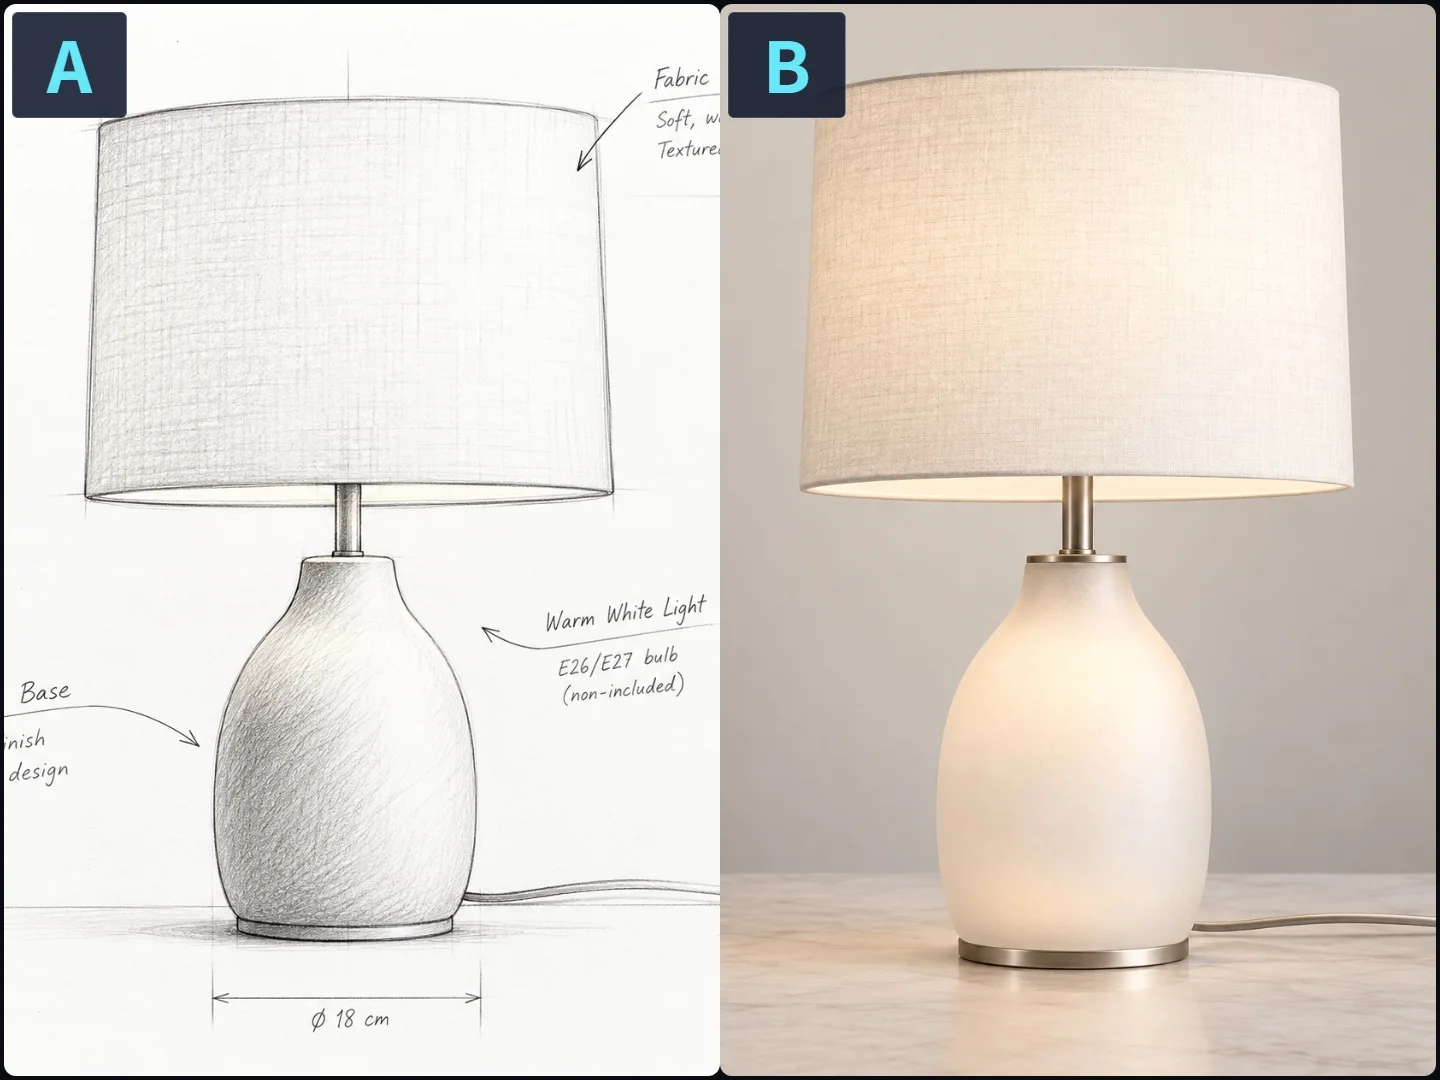
What it does: Turns a rough sketch into something that looks much closer to a real manufactured product.
Best for: Industrial design, product concepts, presentations, crowdfunding, design communication.
Watch out: The sketch should mainly control the shape and structure. Use the prompt to define materials, colors, and lighting. Three pencil lines cannot magically explain “brushed aluminum.”
10. Daytime City Street → Rainy Night Scene
Same street, different mood.
Keep the original street, buildings, and composition unchanged. Transform the scene into a realistic rainy night street. Make the pavement wet and reflective, turn on the streetlights, add light rain in the air, and shift the overall atmosphere into a moody nighttime city scene. Keep the building structure unchanged and maintain realistic photography.
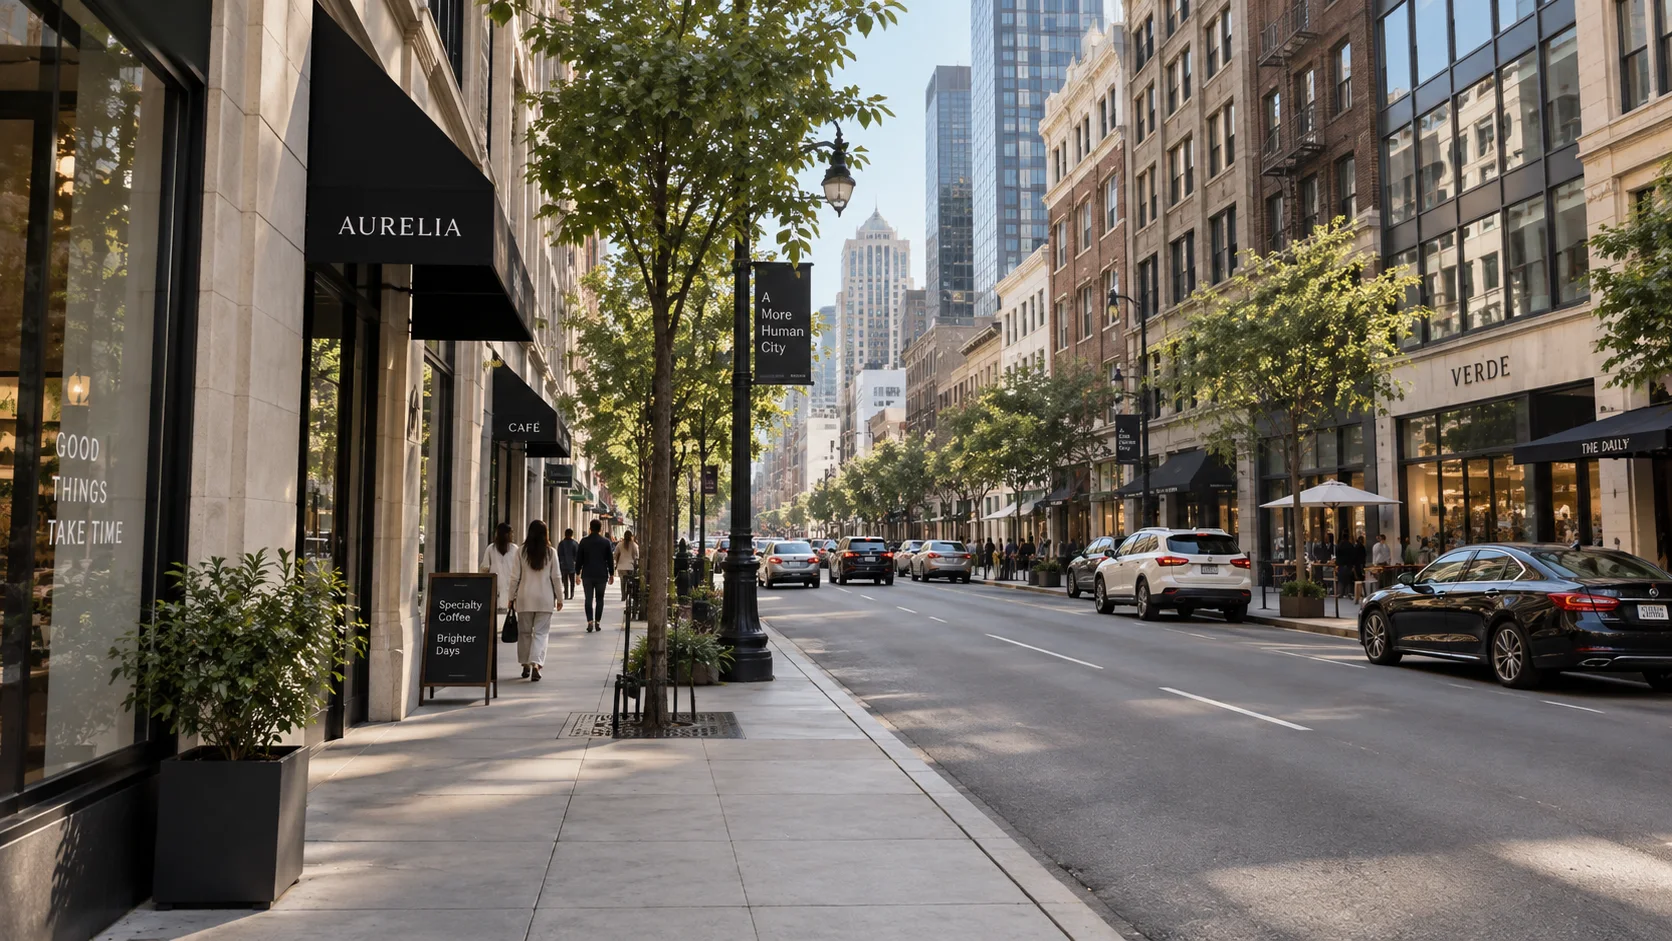
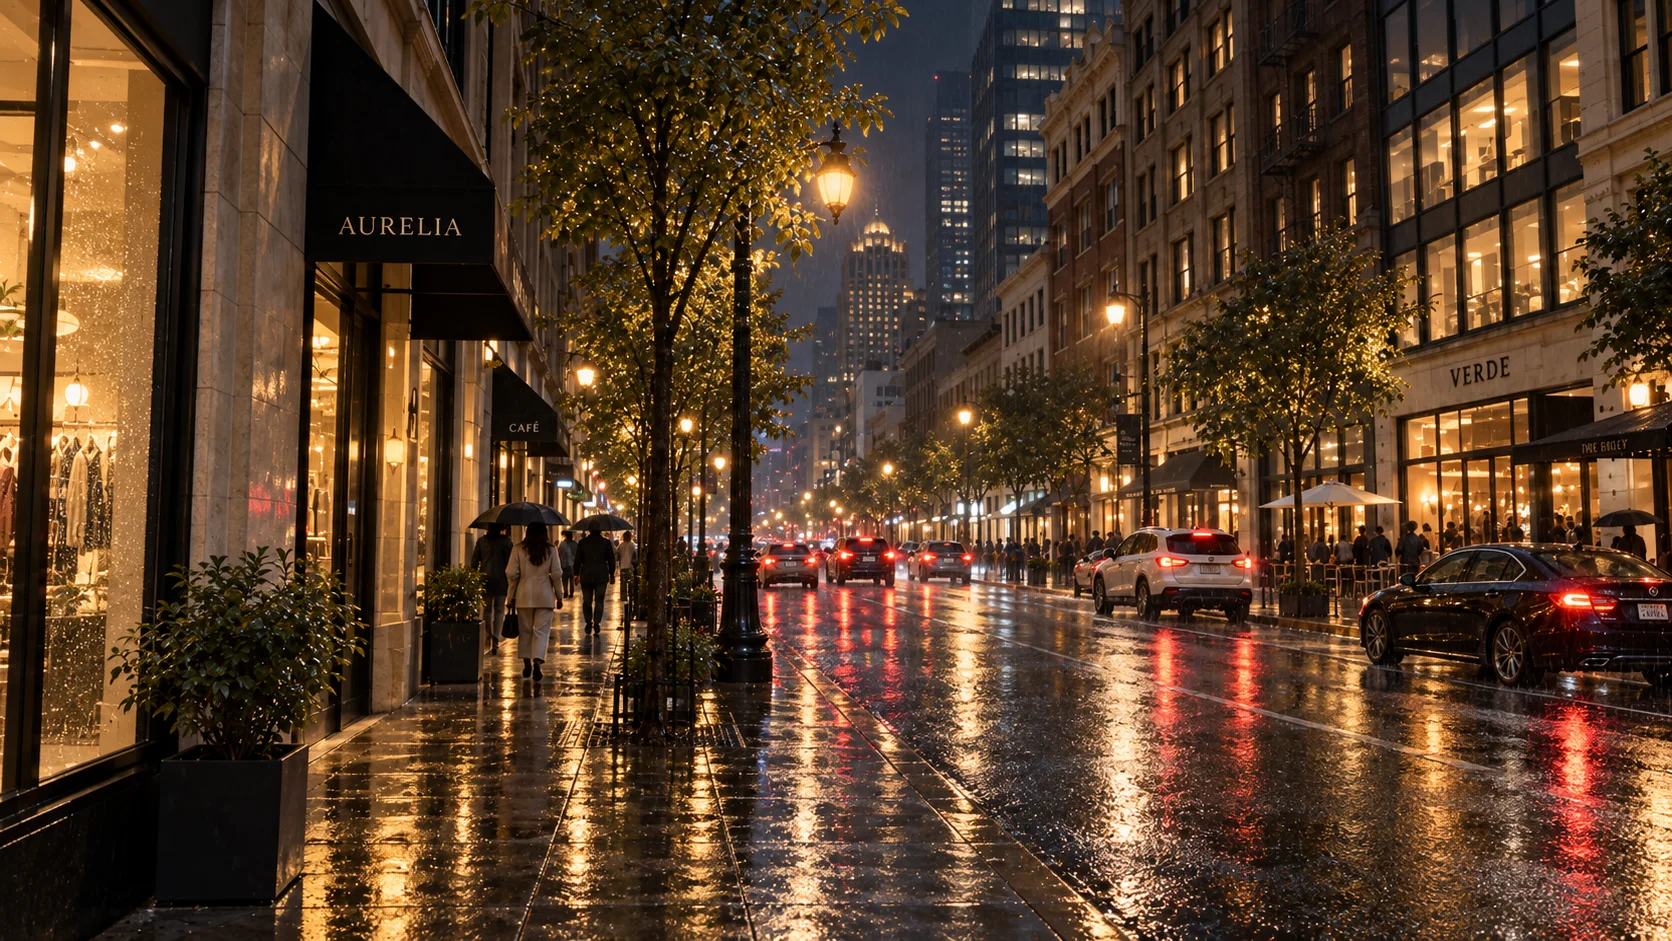
What it does: Keeps the same location while changing the time, weather, and lighting.
Best for: Film concept art, advertising visuals, game environments, travel content, scene design.
Watch out: If you want to preserve the original place, tell the model to keep the buildings and composition unchanged. Otherwise, one rainstorm later, the entire street may have moved.
11. Old Photo → Clean Restored Version
This is still one of the most useful and practical transformations.
Keep the original people, facial features, clothing, and overall composition unchanged. Restore this old photograph by removing scratches, dust, and fading, improving the sharpness, and recovering natural skin tones and details. The result should be cleaner and clearer, but the people themselves must remain unchanged.
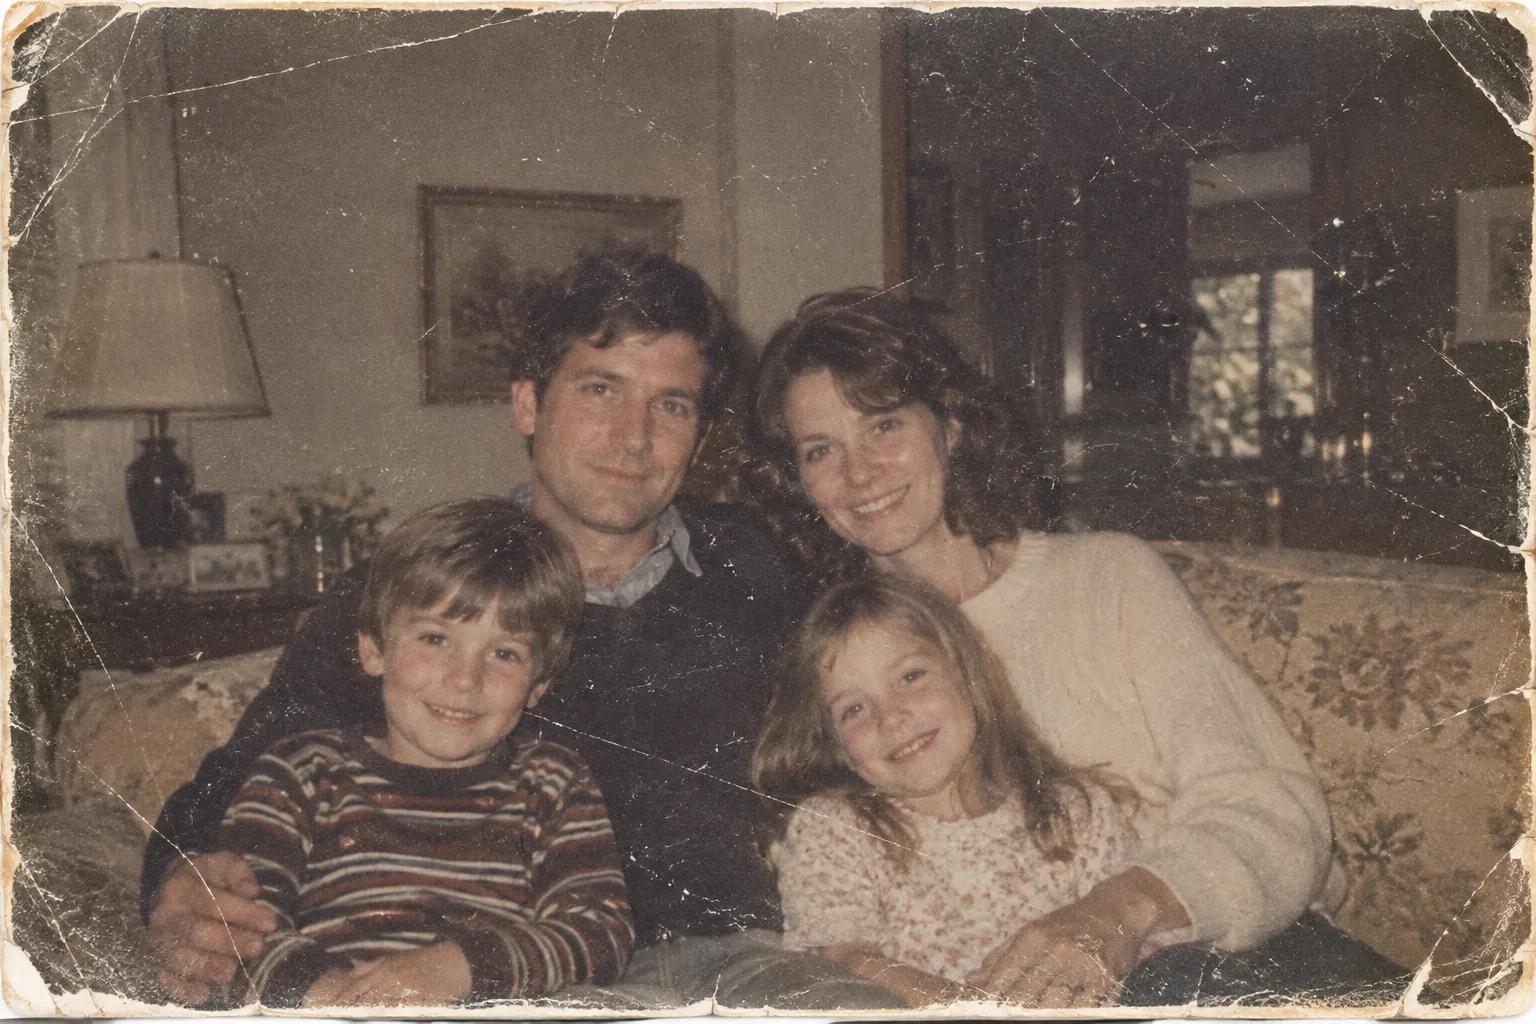
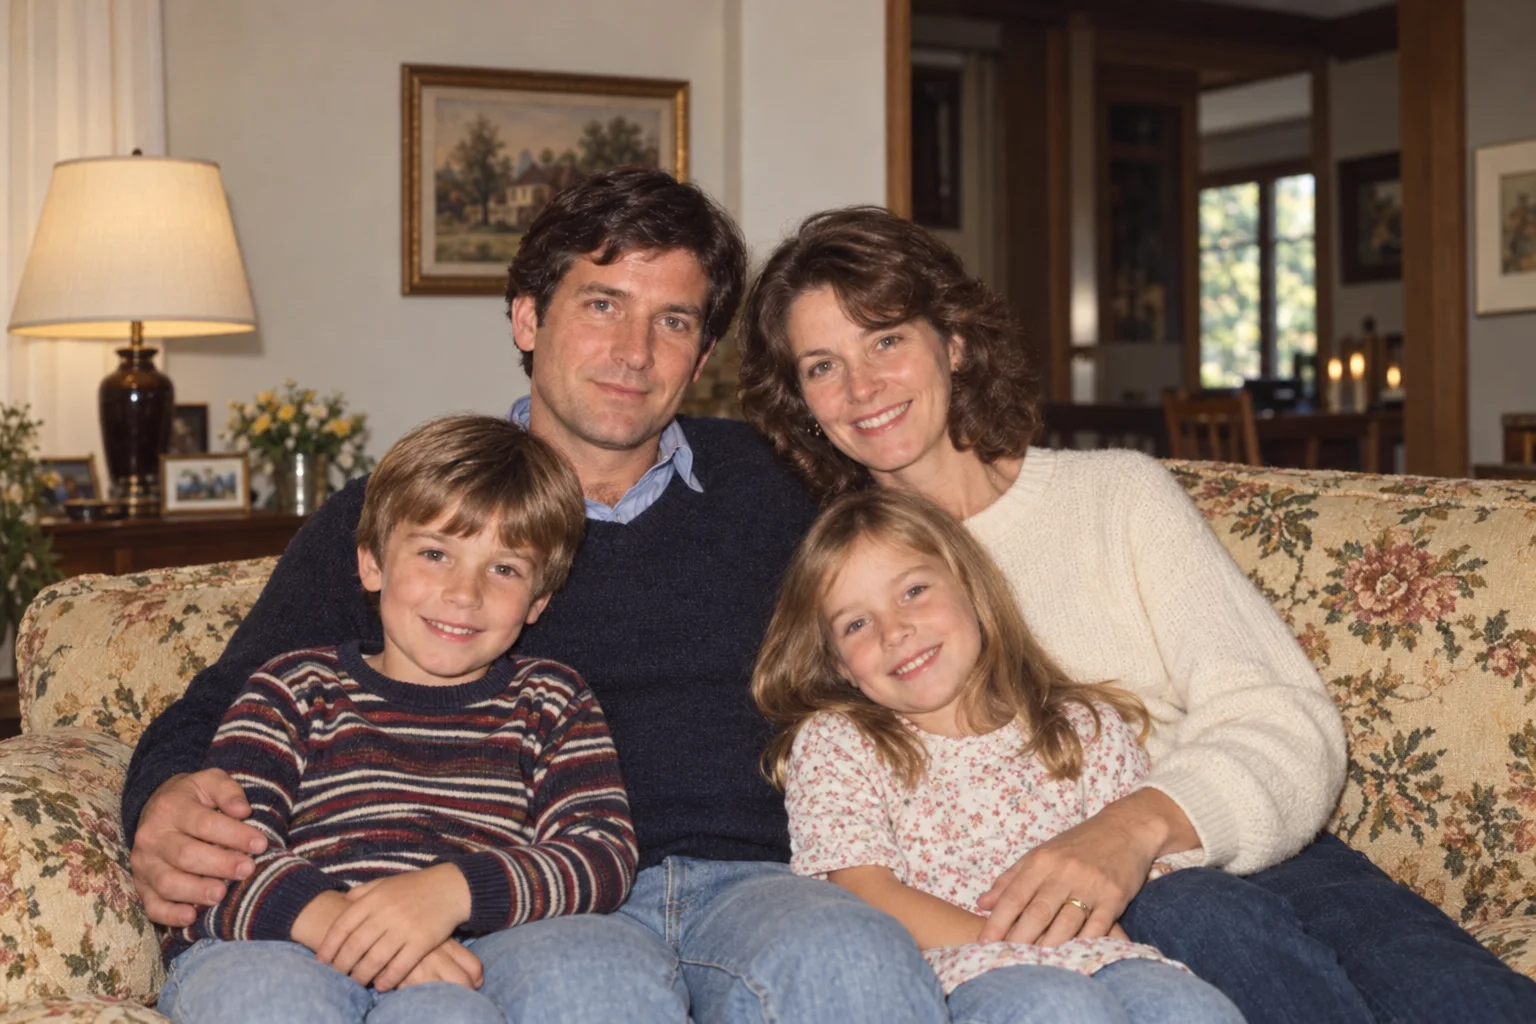
What it does: Removes fading, scratches, dust, and low-detail issues while making an old photo clearer.
Best for: Family photos, memorial images, historical archives, digitizing old albums.
Watch out: The goal is restore, not “reimagine.” If the model beautifies the face too much, you may end up with someone who only vaguely resembles your relative.
12. Casual Pet Snapshot → Premium Pet Portrait
If you want your pet to look like it had a real studio photoshoot, this is the move.
Keep the original pet’s fur color, fur pattern, eye color, and facial features unchanged. Transform this casual pet snapshot into a premium pet portrait. Replace the background with a clean warm-toned studio backdrop, use soft side lighting, and emphasize the fur texture and expression. The final result should look like a professional pet photography portrait.
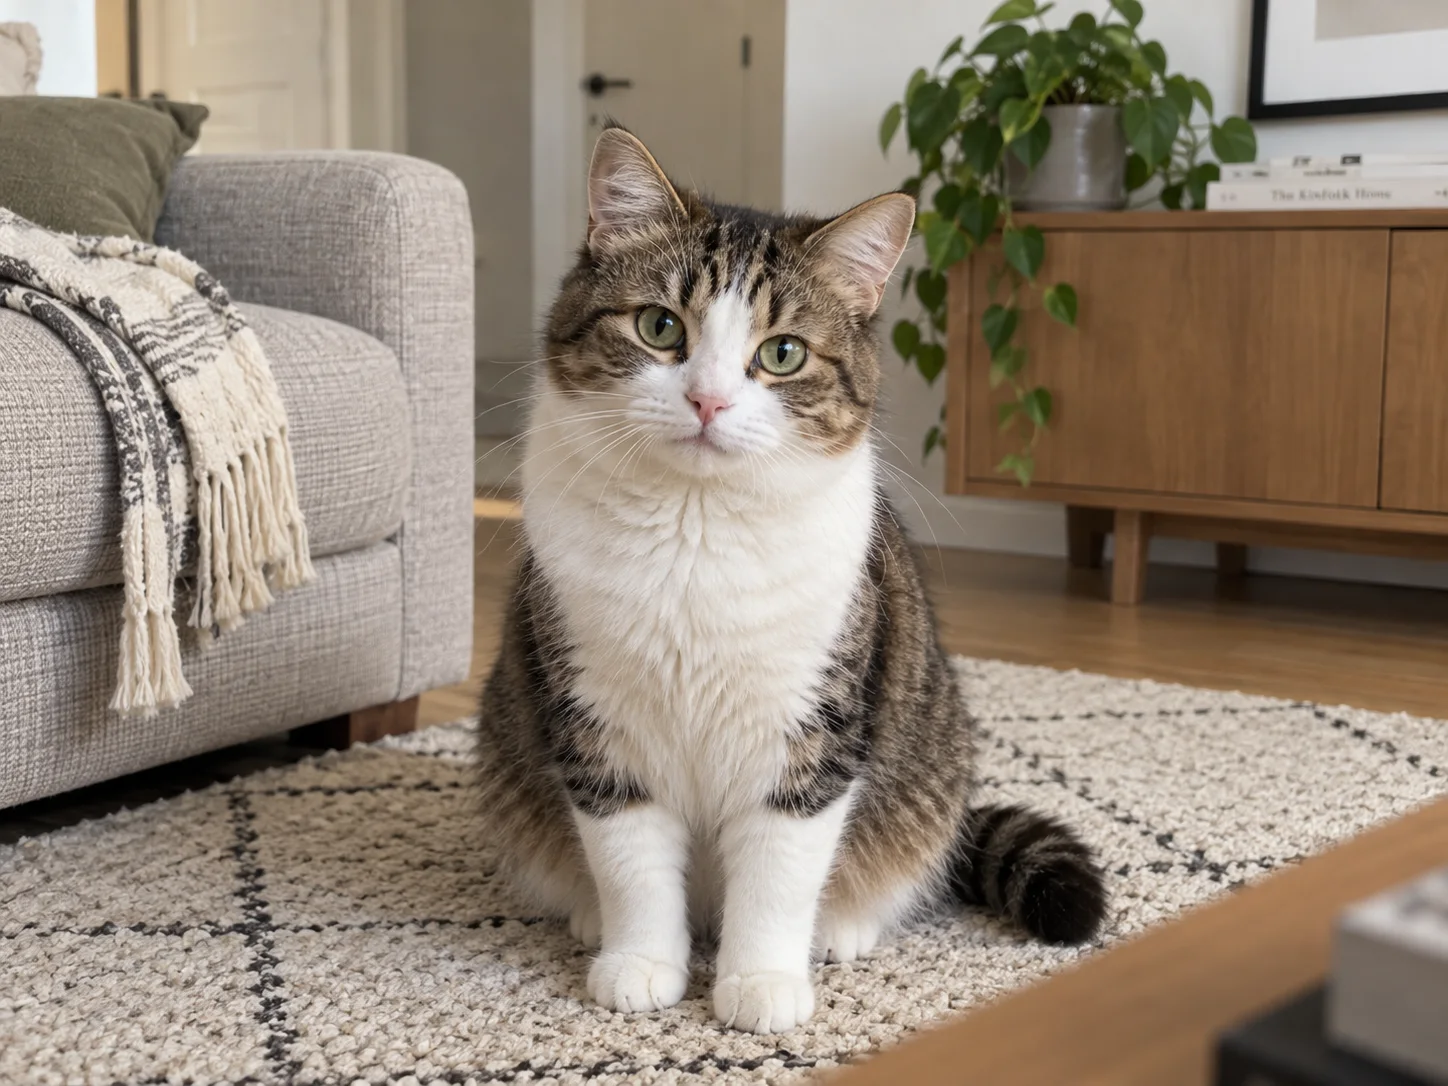
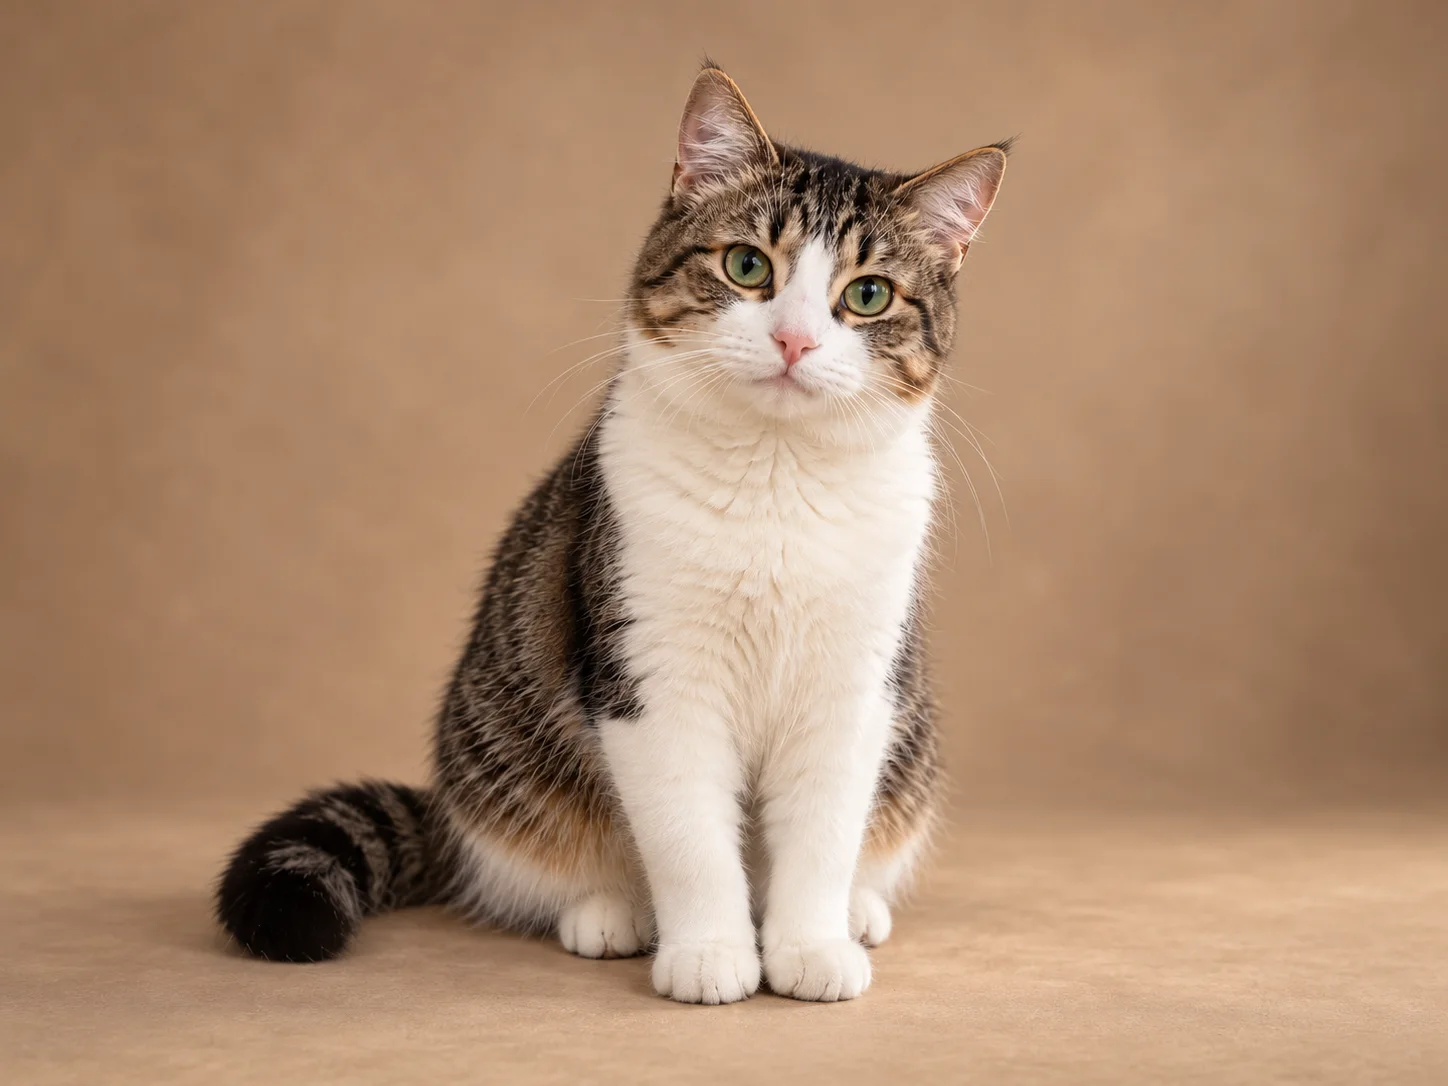
What it does: Turns a casual pet photo into something that looks like a professional studio portrait.
Best for: Pet profiles, memorial photos, social media, pet brands, personalized gifts.
Watch out: Fur color and markings matter a lot. With tabby cats, spotted dogs, or distinctive coats, even a small pattern change can make the owner immediately say, “That is not my pet.”
13. Smartphone Food Photo → Restaurant Ad Shot
A casual food photo can absolutely be saved.
Keep the original food subject and ingredients unchanged. Transform this casual food photo into a premium restaurant-style advertising image. Improve the plating, enhance the food texture and shine, add a better tabletop background and soft side lighting, and make the meal look more rich and appetizing. The final result should look like commercial food photography.
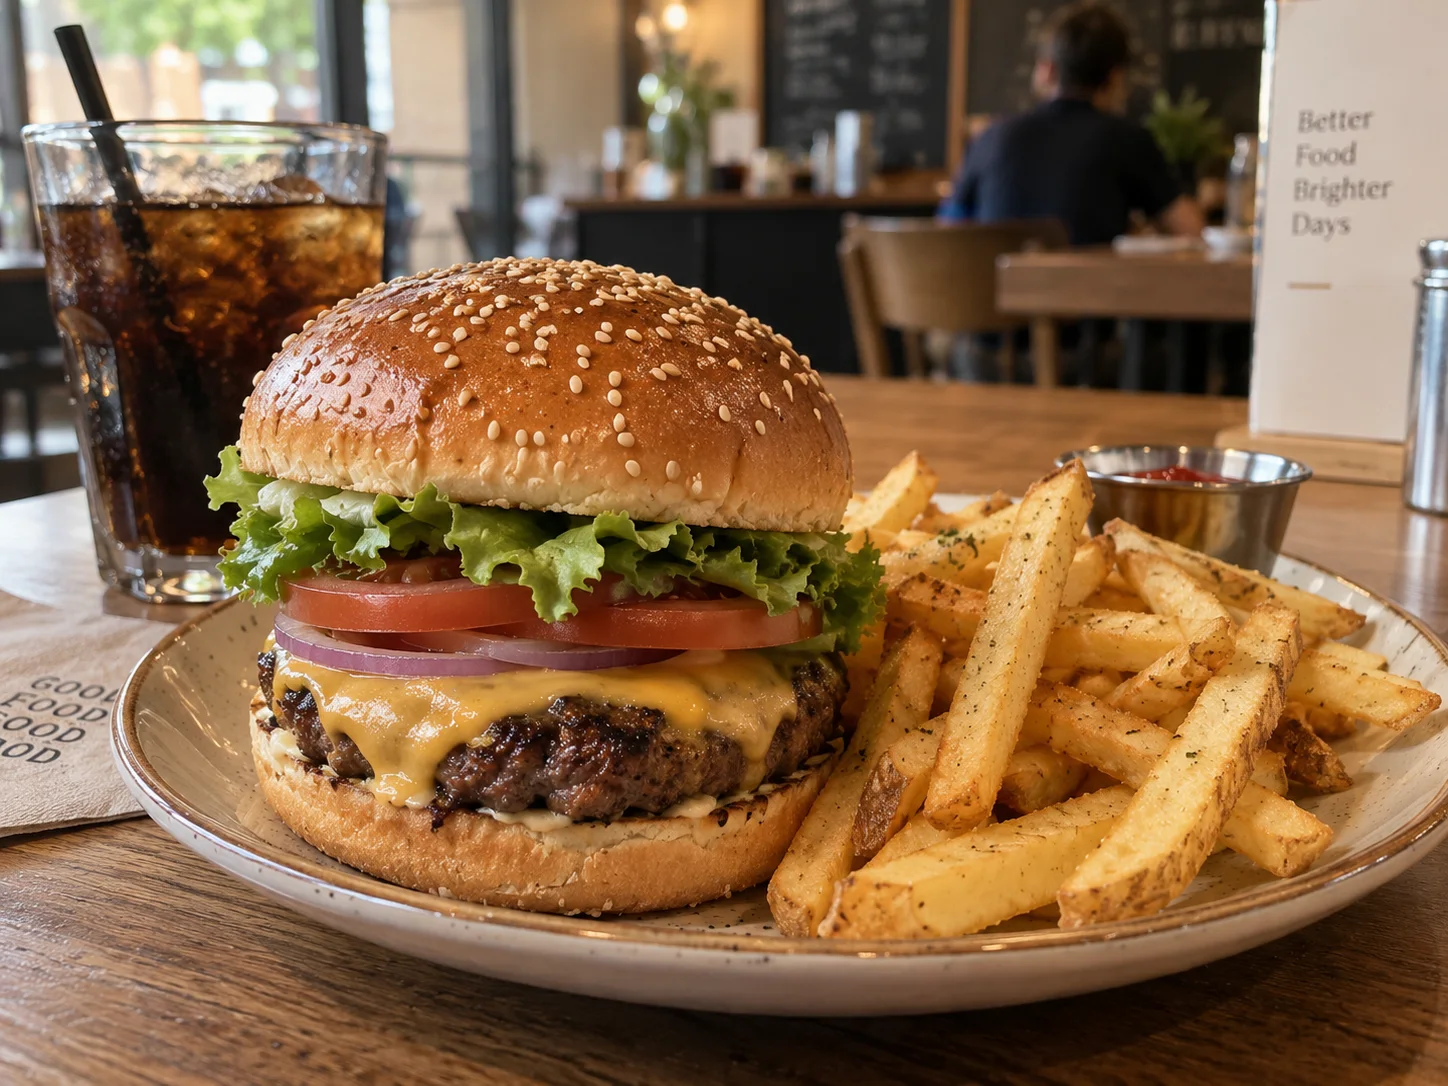
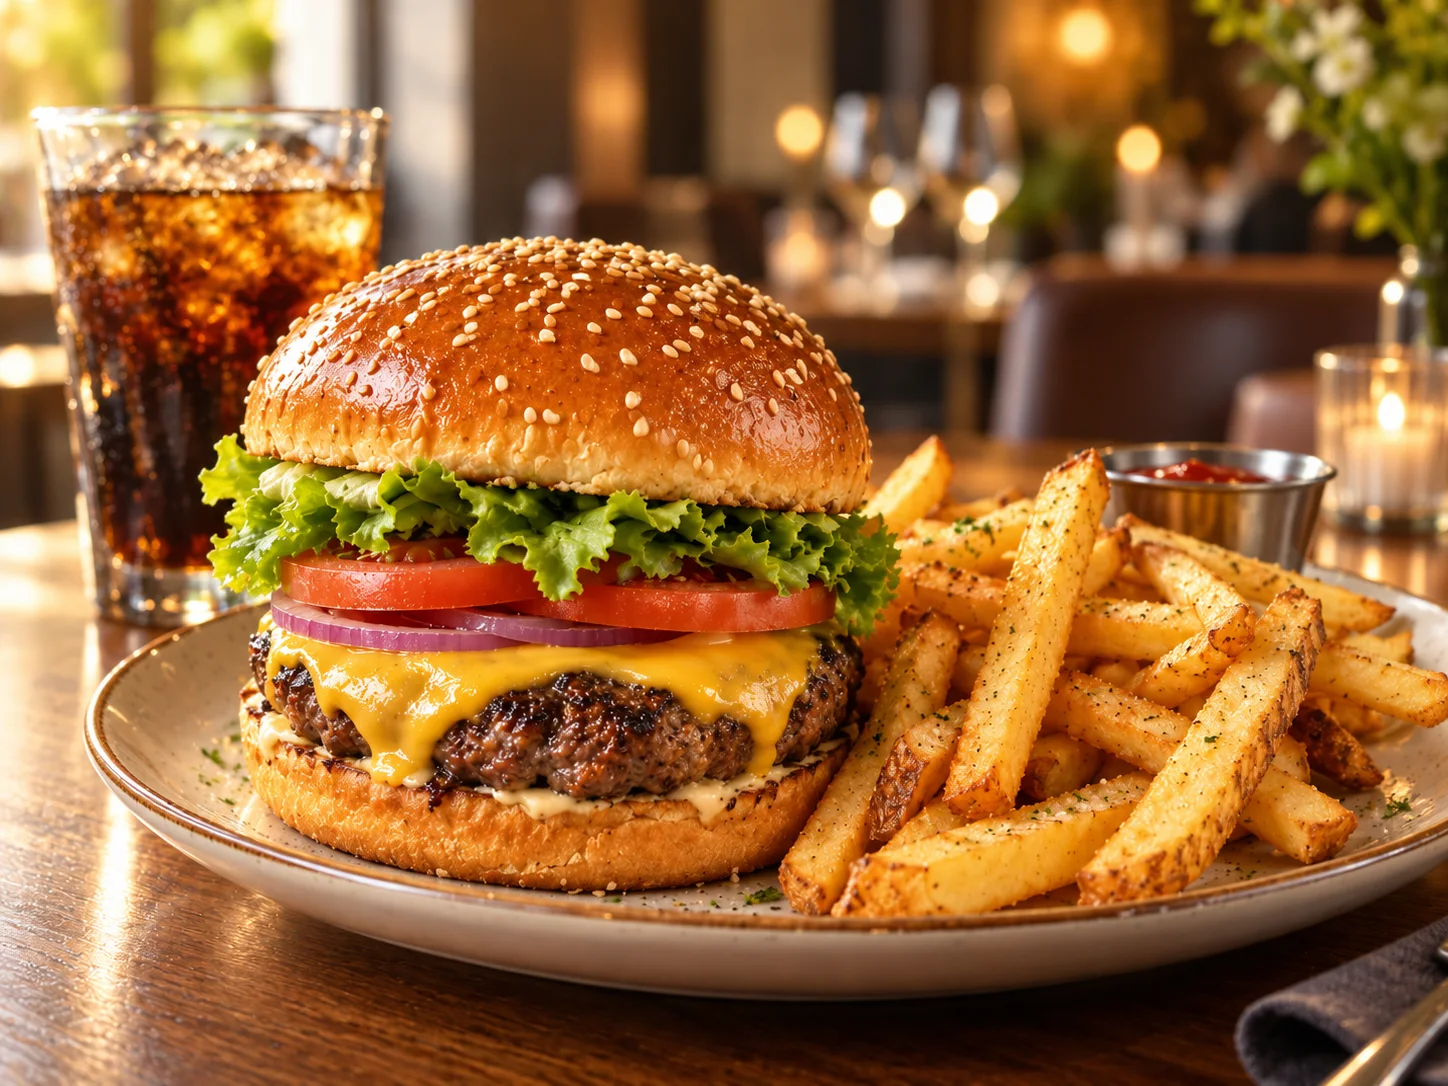
What it does: Keeps the original dish while improving the lighting, presentation, and background.
Best for: Restaurant menus, delivery platforms, social promotion, food advertising, restaurant websites.
Watch out: Don’t let “make it more appetizing” turn into “invent new ingredients.” If the burger suddenly gains a layer of fried chicken, the chef may have questions.
14. Modern House Exterior → Wood-and-Stone Upgrade
For architecture, changing materials while keeping structure is often the safest move.
Keep the original building structure, windows, roofline, and overall composition unchanged. Change the exterior materials into a more premium combination of natural wood and light stone cladding. Make the house feel more high-end and modern, with natural daylight and realistic architectural photography.
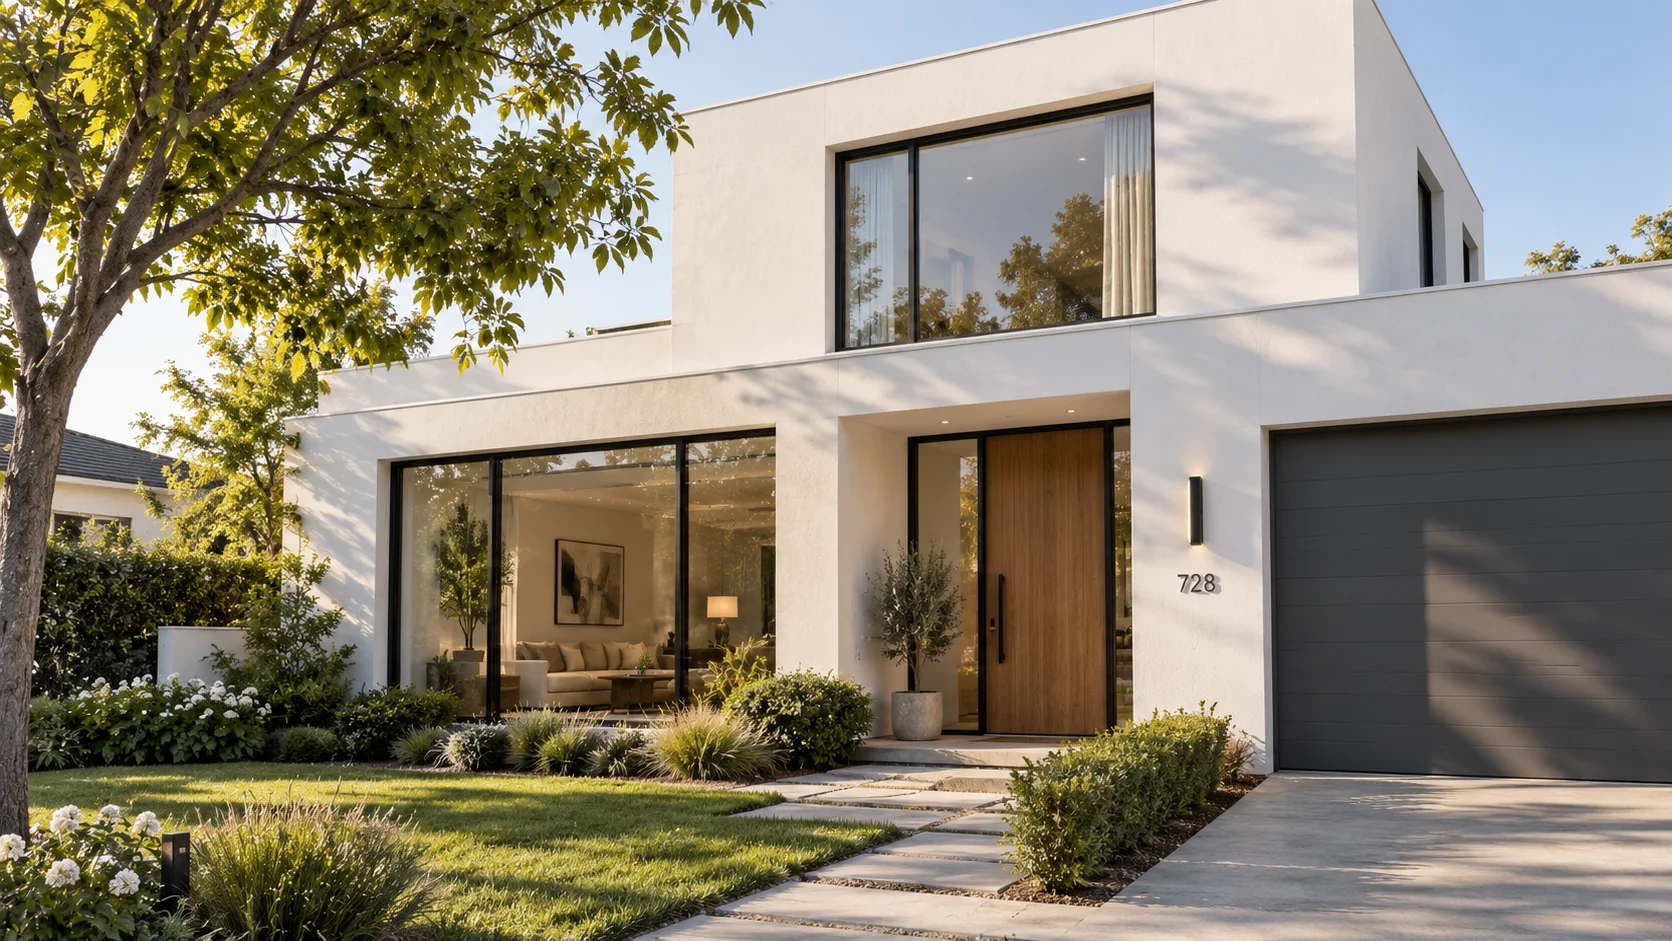
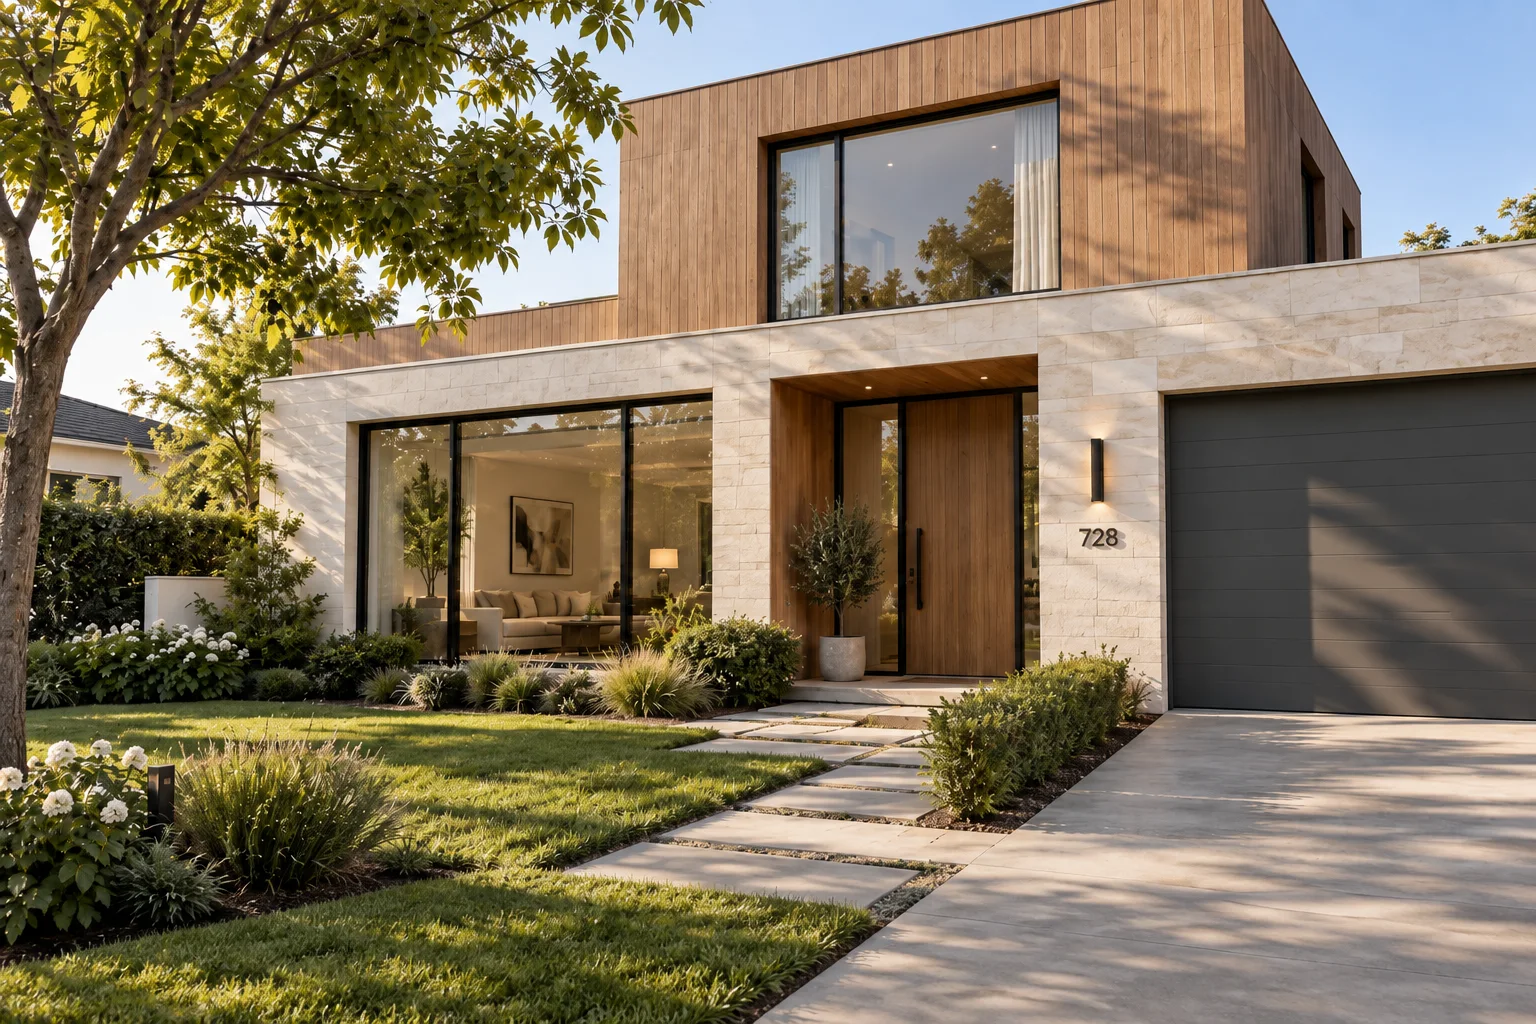
What it does: Keeps the building structure while replacing exterior materials to preview a new architectural direction.
Best for: Architecture, real estate, exterior renovation, client proposals, remodeling concepts.
Watch out: Lock building shape, windows, and roofline. Otherwise, what started as “change the cladding” may end with the AI adding another floor.
15. Casual Travel Photo → Winter Snow Version
Same place, different season.
Keep the original person’s identity, the street architecture, and the overall composition unchanged. Transform the scene into a realistic winter setting. Cover the ground and rooftops with snow, make the trees feel more winter-like, shift the lighting into a colder tone, and keep the subject recognizable. The result should look natural and realistic.
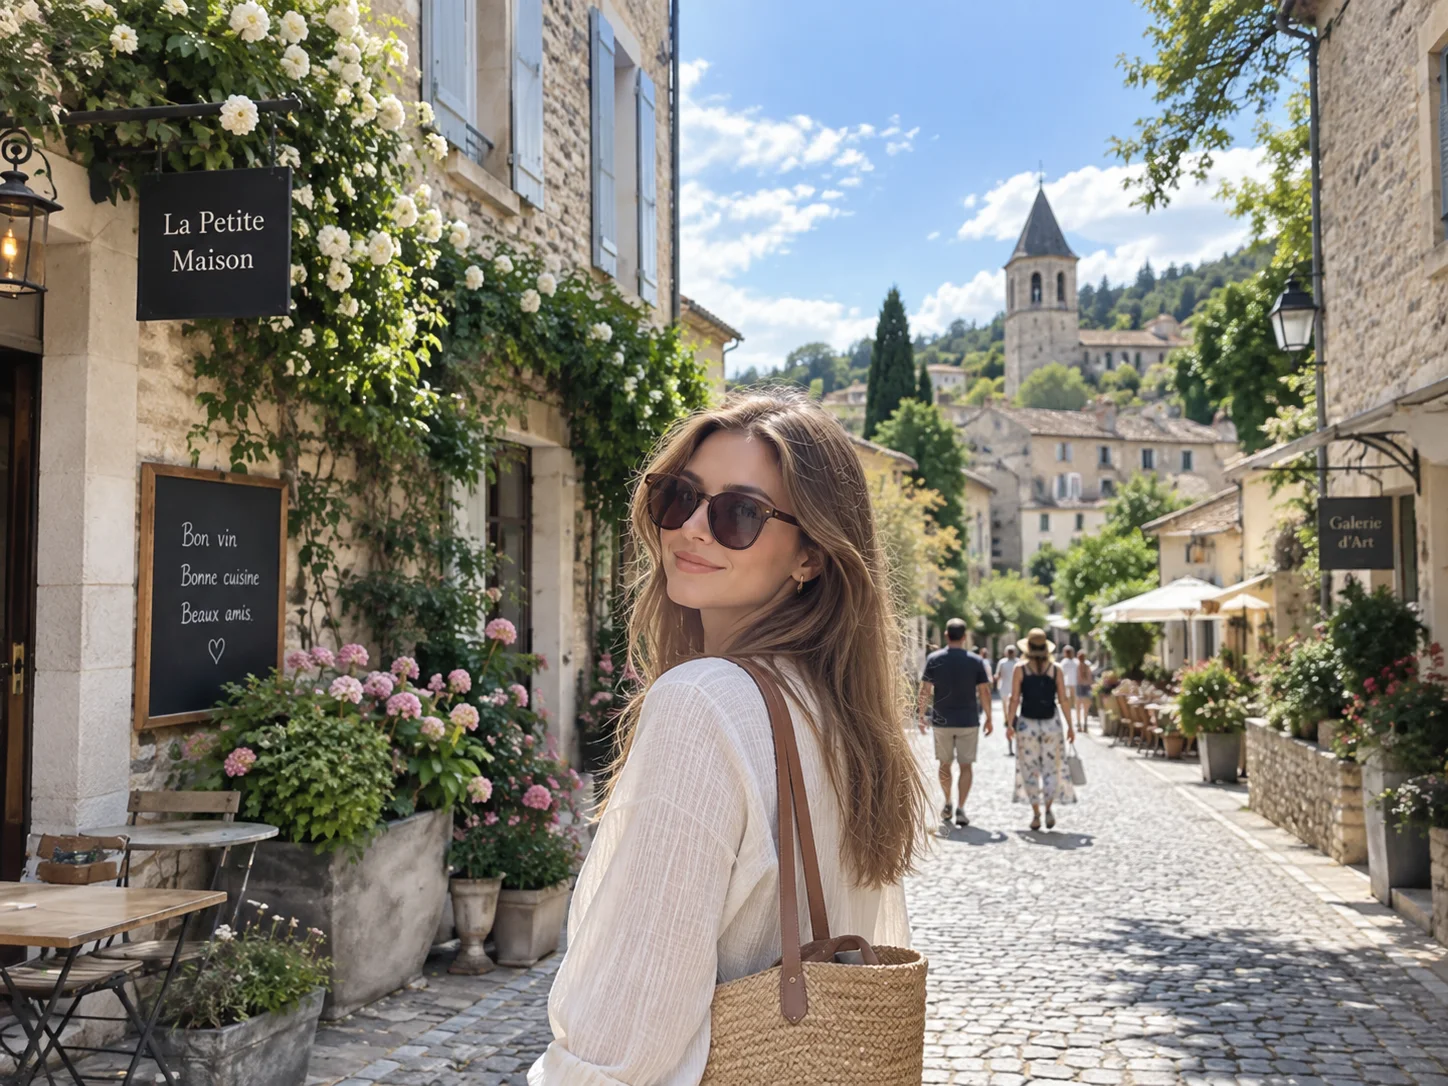
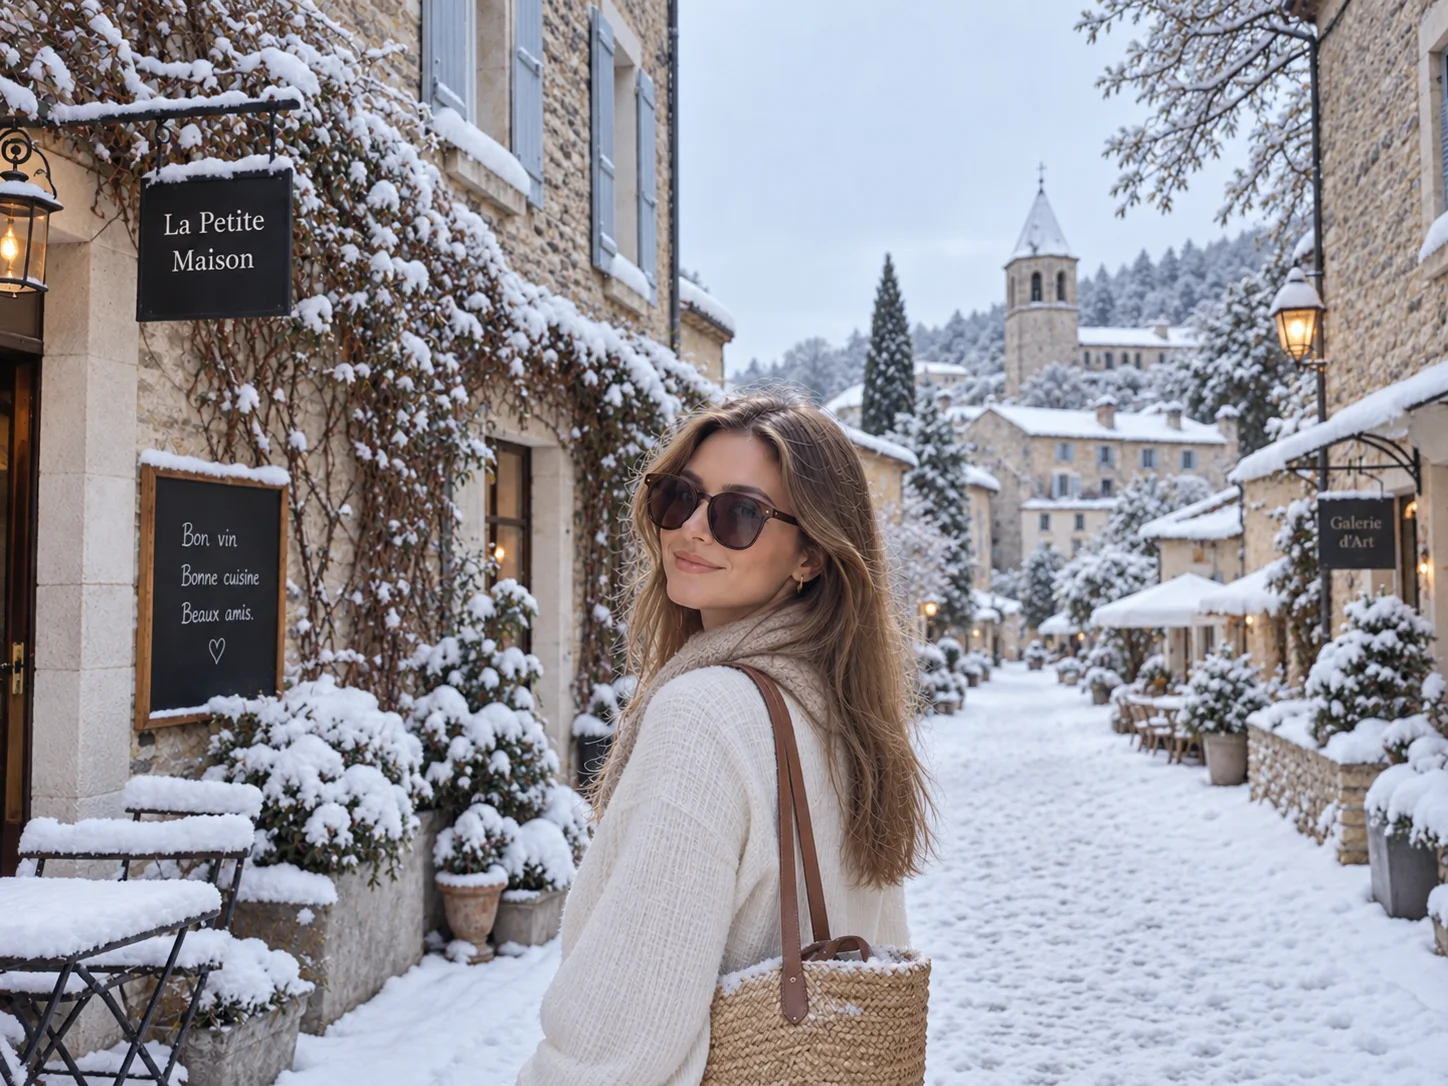
What it does: Keeps the same person and location while changing the season from spring or summer to winter.
Best for: Travel content, seasonal campaigns, social media, tourism promotion, before-and-after comparisons.
Watch out: Keep the seasonal change focused on snow, trees, sky, and lighting. If there is a person in the image, protect the face and clothing so winter does not come with a new identity.
How to Write Image-to-Image Prompts Without Overthinking It
You do not need to write a whole essay.
The easiest structure is:
Keep what matters + Change what you want + Describe the target style
For example:
- Keep this face. Turn it into a professional headshot.
- Keep this product. Turn it into an ad image.
- Keep this room. Redesign it in Japandi style.
Simple usually works better.
Final Thoughts
If you already have a decent source image, image-to-image is often much faster than starting from zero.
You do not always need a brand-new generation.
Sometimes you just need to tell the model:
Keep this. Change that.
That is exactly what Movmix Image to Image is good at.
No need to reroll every time. Sometimes the original image is already halfway there.
'%3e%3crect%20y='2.1906'%20width='26'%20height='17.4314'%20rx='1.55981'%20fill='white'/%3e%3c/g%3e%3crect%20x='0.311961'%20y='2.50256'%20width='25.3761'%20height='16.8075'%20rx='1.24784'%20stroke='%2322257C'%20stroke-width='0.623922'/%3e%3c/g%3e%3crect%20x='13.078'%20y='15.5656'%20width='10.8016'%20height='2.49569'%20rx='0.623922'%20fill='%2366B3FF'%20stroke='%2322257C'%20stroke-width='0.623922'/%3e%3crect%20x='-0.311961'%20y='0.311961'%20width='10.8016'%20height='2.49569'%20rx='0.623922'%20transform='matrix(-1%200%200%201%2012.61%2015.2536)'%20fill='%2366B3FF'%20stroke='%2322257C'%20stroke-width='0.623922'/%3e%3crect%20x='10.3093'%20y='13.3231'%20width='4.91339'%20height='6.98013'%20rx='2.45669'%20fill='%2322257C'/%3e%3cpath%20d='M18.9174%200.31543C20.5962%200.268025%2022.1261%200.655527%2023.9487%201.55762C24.0483%201.60695%2024.1137%201.71153%2024.1137%201.8291V16.502C24.1137%2016.7236%2023.8763%2016.891%2023.6499%2016.7979C21.803%2016.0377%2020.2158%2015.6963%2018.4975%2015.7705C16.8915%2015.8399%2015.1907%2016.2732%2013.0776%2017.0332V1.6709C15.4678%200.825877%2017.2746%200.36187%2018.9174%200.31543Z'%20fill='white'%20stroke='%2322257C'%20stroke-width='0.623922'/%3e%3cpath%20d='M15.3008%204.57C16.3536%203.94578%2019.2783%203.20503%2021.8909%203.94608'%20stroke='%2366B3FF'%20stroke-width='0.935883'%20stroke-linecap='round'/%3e%3cpath%20d='M15.3008%207.26054C16.3536%206.63631%2019.2783%205.89557%2021.8909%206.63661'%20stroke='%2366B3FF'%20stroke-width='0.935883'%20stroke-linecap='round'/%3e%3cpath%20d='M15.3008%209.95107C16.3536%209.32684%2019.2783%208.5861%2021.8909%209.32714'%20stroke='%2366B3FF'%20stroke-width='0.935883'%20stroke-linecap='round'/%3e%3cpath%20d='M15.3008%2012.6398C16.3536%2012.0156%2019.2783%2011.2749%2021.8909%2012.0159'%20stroke='%2366B3FF'%20stroke-width='0.935883'%20stroke-linecap='round'/%3e%3cpath%20d='M7.08257%200.31543C5.40384%200.268025%203.87393%200.655527%202.05132%201.55762C1.95165%201.60695%201.88628%201.71153%201.88628%201.8291V16.502C1.88628%2016.7236%202.12373%2016.891%202.35014%2016.7979C4.19702%2016.0377%205.78418%2015.6963%207.50249%2015.7705C9.10852%2015.8399%2010.8093%2016.2732%2012.9224%2017.0332V1.6709C10.5322%200.825877%208.72541%200.36187%207.08257%200.31543Z'%20fill='white'%20stroke='%2322257C'%20stroke-width='0.623922'/%3e%3cpath%20d='M10.6992%204.57C9.64638%203.94578%206.72175%203.20503%204.10907%203.94608'%20stroke='%2366B3FF'%20stroke-width='0.935883'%20stroke-linecap='round'/%3e%3cpath%20d='M10.6992%207.26054C9.64638%206.63631%206.72175%205.89557%204.10907%206.63661'%20stroke='%2366B3FF'%20stroke-width='0.935883'%20stroke-linecap='round'/%3e%3cpath%20d='M10.6992%209.95107C9.64638%209.32684%206.72175%208.5861%204.10907%209.32714'%20stroke='%2366B3FF'%20stroke-width='0.935883'%20stroke-linecap='round'/%3e%3cpath%20d='M10.6992%2012.6398C9.64638%2012.0156%206.72175%2011.2749%204.10907%2012.0159'%20stroke='%2366B3FF'%20stroke-width='0.935883'%20stroke-linecap='round'/%3e%3c/g%3e%3cdefs%3e%3cfilter%20x='0'%20y='2.1906'%20width='26'%20height='17.4314'%20filterUnits='userSpaceOnUse'%20color-interpolation-filters='sRGB'%3e%3cfeFlood%20flood-opacity='0'%20result='BackgroundImageFix'/%3e%3cfeBlend%20mode='normal'%20in='SourceGraphic'%20in2='BackgroundImageFix'%20result='shape'/%3e%3cfeColorMatrix%20in='SourceAlpha'%20type='matrix'%20values='0%200%200%200%200%200%200%200%200%200%200%200%200%200%200%200%200%200%20127%200'%20result='hardAlpha'/%3e%3cfeOffset%20dy='-1.24784'/%3e%3cfeComposite%20in2='hardAlpha'%20operator='arithmetic'%20k2='-1'%20k3='1'/%3e%3cfeColorMatrix%20type='matrix'%20values='0%200%200%200%200.572549%200%200%200%200%200.768627%200%200%200%200%200.976471%200%200%200%201%200'/%3e%3cfeBlend%20mode='normal'%20in2='shape'%20result='effect1_innerShadow_0_4'/%3e%3c/filter%3e%3c/defs%3e%3c/svg%3e)